Hey everyone, even though things are still crazy with the whole pandemic thing… I do hope you all had a pleasant New Year. After taking a slight break from work myself, I am back strong with a new series I’ve wanted to attempt for a while.
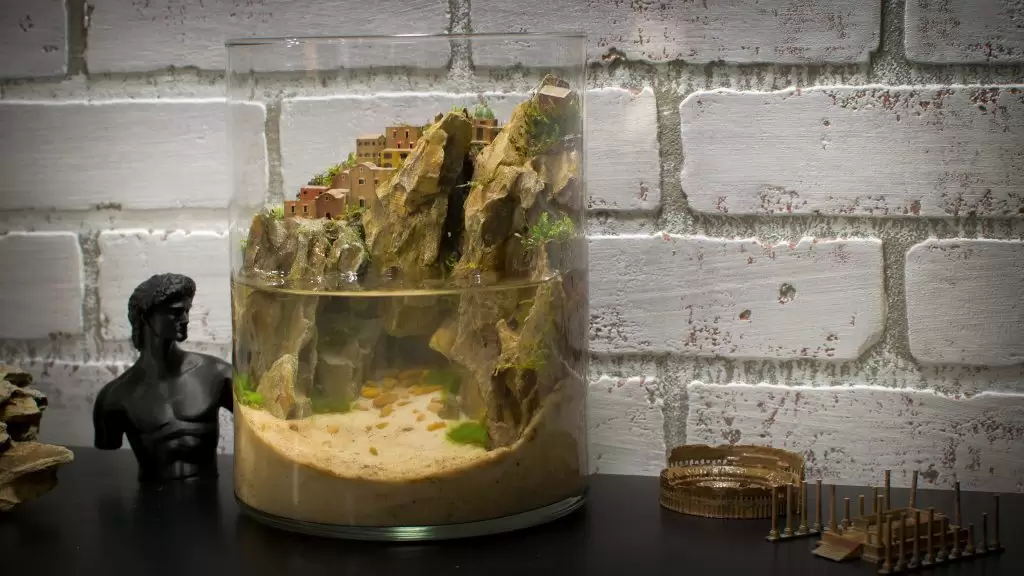
Today I’m going to walk you through the process of making a coastal village cliffside terrarium with an aquatic overlook (that’s a really fancy way to describe a paludarium isn’t it). This will be the first of a couple of living dioramas I’m making for the Italiano series.
If you’re new to the concept of a Bantamarium, I highly recommend checking out the detailed guide I’ve created. In essence, a Bantamarium is a versatile vivarium designed to bring miniature ecosystems to life. It’s a concept I’ve developed to make it easier for anyone—regardless of experience level—to create a thriving, visually stunning vivarium that blends art with nature.


The Name’s Earth… Bantam.Earth!
To start this Italian collection off, I felt like it was very appropriate to work our way into the country quite literally… starting with the coast! This aqua terrarium pulls a lot of its inspiration from the Amalfi coast located just off the southeast edge of Italy. This vintage utopia reminds me of an opening scene from a James Bond movie for some reason, so you probably know where I’m going with the initial theme for the video essay.

Making A Mini Coastal Village Aquatic Terrarium
Attempting to recreate a cliffside scenery in a jar will not be a challenge at all. We will make a few strategic adjustments to the layout of our hardscape and build around that. Let’s start with the materials that will be needed to bring this project to life:
Materials:
- Bantamarium Jar 8″ x 6″
- Coastal Mediterranean Village Decor
- Sheet Moss
- Phoenix Moss (Fissidens Fontanus)
- Java Moss (Taxiphyllum Barbieri)
- Brown Gravel
- Natural Sand
- Ohko Stone (Dragon Stone)
- Aquascaping Tool Kit
Miniature Fairy Village Decor:
At the time this tutorial was written, I offered these models unpainted and unassembled. we are proud to announce that our terrarium decor has been improved since then and is now available completed with color. If you so choose to add personalized details, these models are still paintable. Just remember to properly seal them with an aquarium-safe sealant and allow it to cure before use.


Making A Coastal Cliffside terrarium decor:
For this type of terrarium, I will use our signature bantamarium jar. I like the idea of the taller vases where there’s room to combine a terrarium with aquatic features making it a paludarium. Any long-time viewer of bantam.earth knows I’m obsessed with paludaria and I tend to struggle not to end up with one whenever constructing either a terrarium or aquarium.


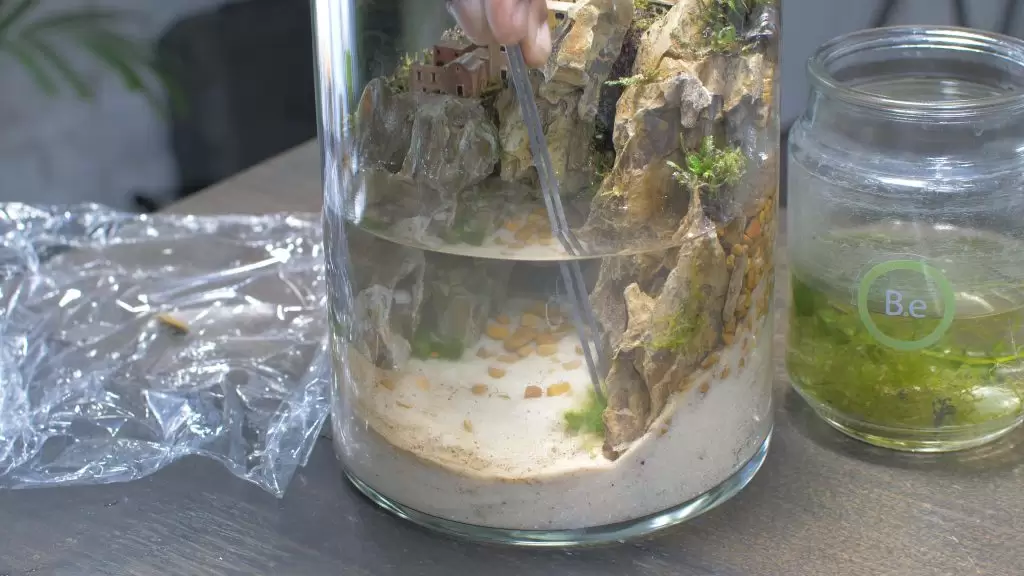
So let me show you my process and it starts with the 5-inch round vase I tend to use for most of my aqua terrariums. With a couple of cups of sand, I pour a substrate that’s about an inch and a half thick. This will make it easier to balance the hardscape as we figure out the arrangement.


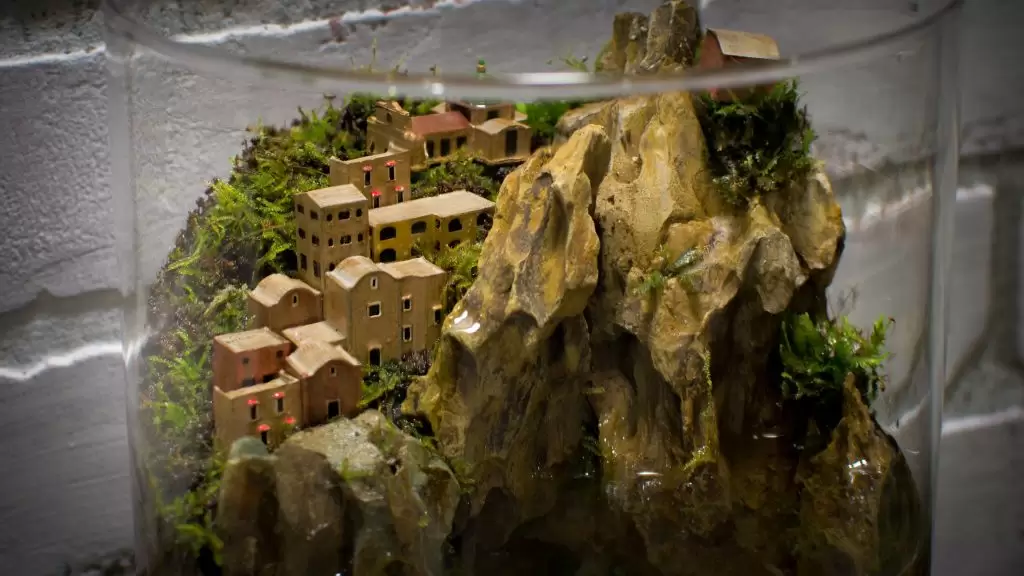
With a pretty good understanding of geography, there are quite a few options one could consider for the hardscape aspect of this enclosure. I settled on dragon stone as its structure, color, and availability made it a perfect match with the existing cliffsides you’ll see in Southern Italy.


I like the jagged edges this stone naturally has but finding a neat way to arrange them did prove to be a little challenging. Once I started to find a formation I liked, I shifted the glass continually to create a slope for the sand to fall around the rocks. The idea here is to create a natural look of sediment as if the rock is slowly transitioning into the sand.


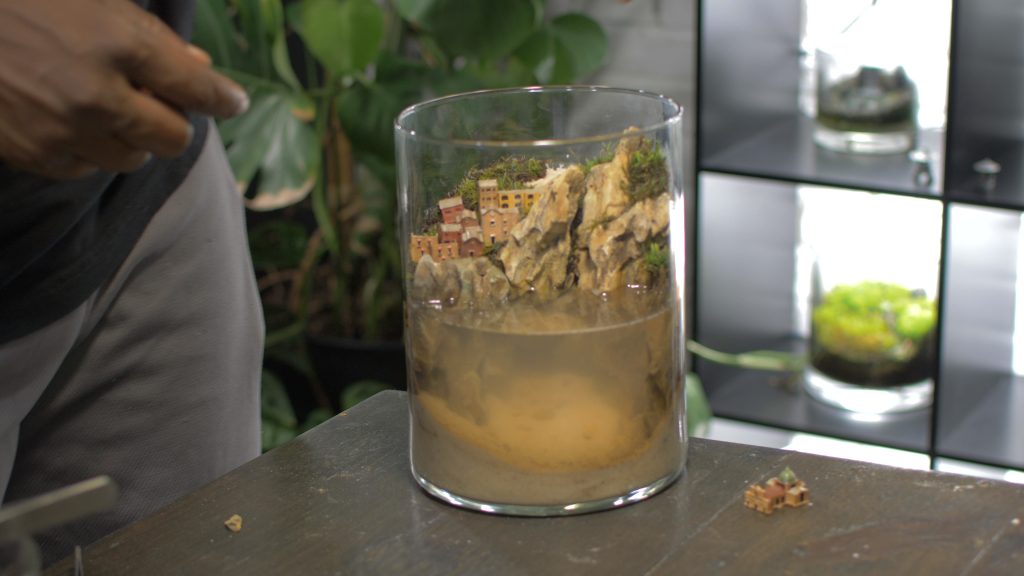
Once the rocks are in position, I turn the vase around and fill the back with similar colored pebbles. This is going to create a base for the village and plants to rest on. In a way, this acts as a false bottom that helps keep the terrarium aspect of the enclosure completely separate from direct contact with water. It also provides aeration for the top substrate layer as well as locks the things in place since sand will gradually fall until leveled.


Once the base is formed with the pebble stones, an additional layer of sand and soil can be added to create the first layer of our terrarium substrate. The models are then placed in and arranged accordingly and clean water is added to the setup.


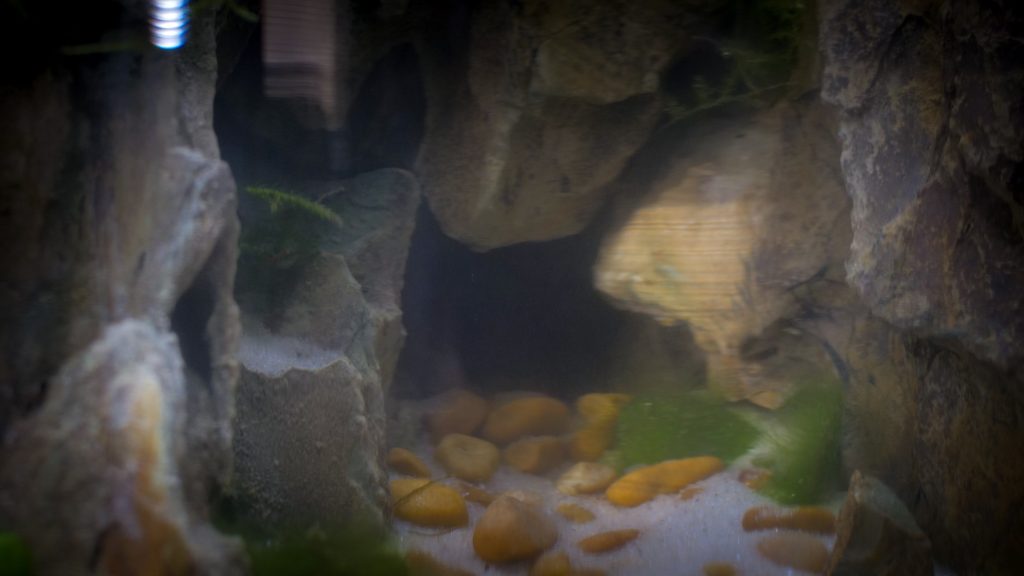
While finishing off the substrate layer, I noticed a few of the pebbles had fallen into the foreground area. There was a small gap between the dragon stones around the middle of the hardscape that I didn’t notice at first. Since the gravel worked itself into interlocking with that gap, I decided to leave it as it was. It now appeared to look like an unintentional cave formed underwater which I thought was a neat little feature to have in this microscape.

Coastal Cliffside Terrarium Plants
I decided to use sheet moss as my main choice of plant for this enclosure. It had been a while since I’ve used this type of moss and I felt like it would look really good for this setup. I slowly placed small amounts around the houses until the substrate was no longer visible.


For tighter areas where I wanted to add diversity with the foilage, Phoenix moss is placed. I like working with this type of moss because of its versatility above ground as well as underwater.

Next, little strings of java moss are placed around the cliff edges to further enhance the natural look of a real place. As a final addition to the flora list, Bacopa Sp. is placed in areas between the rock and sand.

Coastal Terrarium Animals
From the very beginning of this build, I had my mind set on keeping things simple with one or two snails. To keep the 007 themes for this coastal village terrarium going, I’ve decided an assassin snail will take refuge here. These guys are extremely interesting microfauna to keep and if you’re interested in seeing them in action, be sure to follow my social media!
Mini Cliffside Village Terrarium Care
As with most of my miniature terrariums, this tank should do well on its own. As things grow in, the natural takeover will only further enhance the scenery. If you haven’t already, mist down the scape and seal it with a little plastic wrap. Open it every once in a while to allow fresh air to circulate.

Water changes will have to be done regularly (once or twice a month) since the water is stagnant and doesn’t have mechanical filtration. Outside of that, I will through feeder snails into the paludarium every once in a while for our assassin snail to make quick work of.
Final Thoughts
This is pretty much everything needed to reproduce one of these coastal village aquatic terrariums for yourself. I hope you guys like the diverse take on this new enclosure and I look forward to showing you what’s next for the Italiano Series. See you at the next one!


If you’re interested in seeing updates on how this as well as other enclosures progress follow me on social media. If you’d like to get your tall tweezers on one of these limited edition vivarium decors yourself, check them out in our shop.


