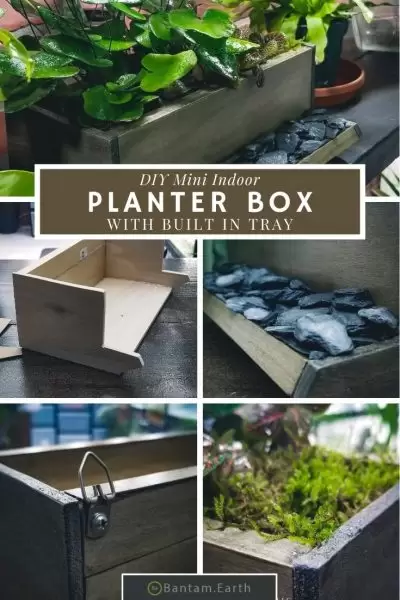
So with our workshop/office remodel finally coming closer to the look I’ve been aiming for, implementing more wall art has been the main focus lately. Carefully considering a number of ideas for my Heart Fern, I decided to move it out of the pot it has been living in and build a nice little wooden box for it. This tutorial will walk you through how to make a wall-mounted, miniature, indoor planter box for a Hemionitis Arifolia or other terrarium plants with similar care requirements.
How Planter Boxes Work
Planter boxes are an easy way to maintain a variety of different plant types. They are like open-top terrariums, usually for window sills or outdoor gardens. They are very commonly made from wood or plastic with drainage holes underneath for excess water to flow out.
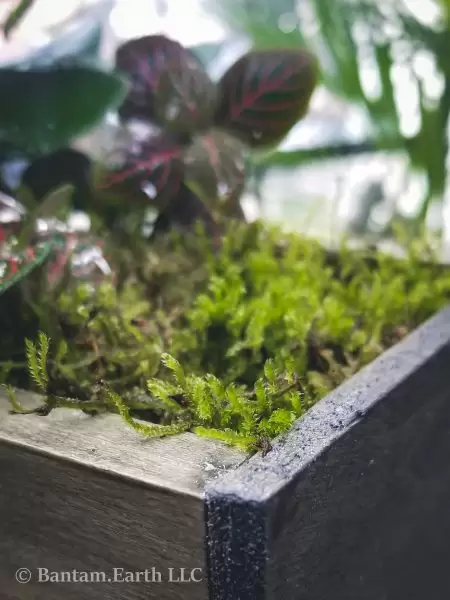

Planter boxes can also be constructed without drainage holes. This allows for locations where space or excessive water usage is limited. Like indoors… hanging on a wall… right over an electrical outlet (Of coarse that would be me). These types of planters will have a drainage layer built into the box for excess water to settle.
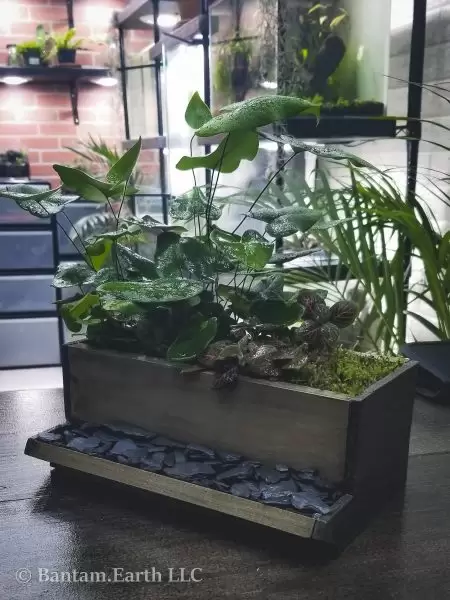
The planter box we are making today will have the drainage tray built into it so we can more easily add water as well as monitor the amount of water it has in it at all times. It will also be constructed specifically to hang on a wall indoors but can easily be placed on a table, window sill, or various outdoor locations.
DIY Mini Indoor Planter Box
For this design, I wanted to make a planter box that would not utilize a ton of materials and could be put together with hand tools I had laying around the house. It is just under one foot long and about five inches tall without plants. Since I will be using a Heart Fern for the main focal point of the plant… I wanted to make sure the area it was going in had at least fifteen inches of height since Heart Ferns grow to about 10 inches max in height. If you would like to check out the care guide on how to maintain this type of plant before considering it, be sure to check out this guide.

Materials:
- Panel Hardwood (.5 x 2.5 x 36in)
- Panel Hardwood (.25 x 6 x 36in)
- Plants (Heart Fern, Sheet Moss, Nerve Plant)
- Substrate (Potting Soil)
- Rocks (Small Slate Chips)
- Wood Stain
- Hot Glue Sticks
- Wire Brads (#19 x 1/2in)
- Polyurethane Spray (Semi-Gloss)
- x2 Hole D Ring Hangers
Tools:
Constructing The Planter Box
The first thing we need to do is cut out the pieces of wood panels we need to assemble the box. I used a circular saw to cut the wood panels into individual pieces that will form the planter boxes walls.
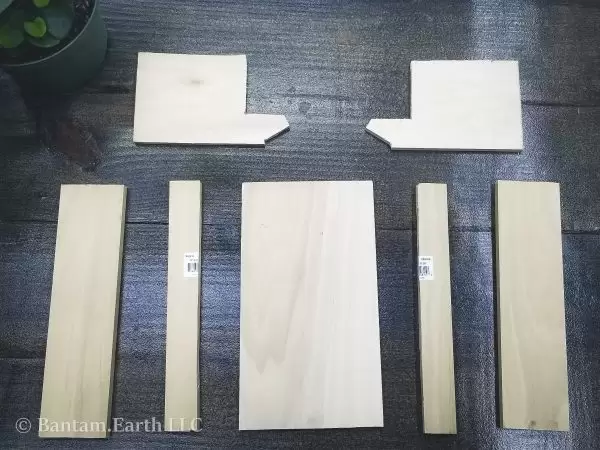

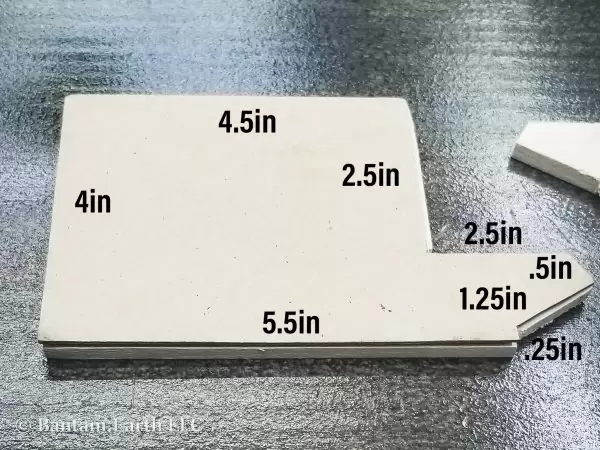
Starting with the easiest piece, cut the quarter-inch-thick panel 5.5in x 10in. this will act as the bottom base of our planter box. Next, cut 2 pieces of the half-inch-thick panel 2.5in x 10in. One-piece will be the lower back of the box, the other will be the top front panel. Cut 2 more pieces of the half-inch-thick panel 1.25in x 10in. One-piece will be the upper back panel and the other panel will be the front lip forming the planter boxes tray. Lastly, we will need to cut 2 side panels from the quarter-inch-thick panel. I will provide an illustration of those exact measurements down below.

Once we have all the panels cut, do a quick rough sand to file down any jagged edges. I used the hot glue to put the pieces together. Hammer wire brads into the sides to secure the structures assembly. The hot glue won’t be strong enough to hold the weight of the planter box once we fill the box with rocks, substrate, and plants.
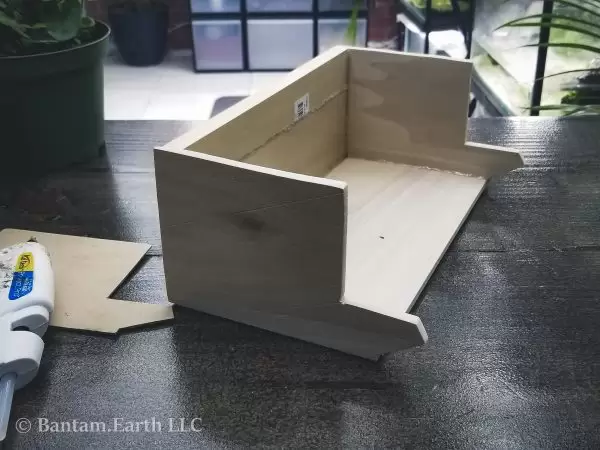

Now that we have a basic planter box constructed. we can apply the stain and seal it with polyurethane. I used the sponge to rub on about 3 coats of stain and let each coat dry for about ten minutes. The polyurethane will help waterproof the wood as well as seal off any cracks between the hot glue. Just as an extra precaution, it doesn’t hurt to rub a light coat of silicone inside the box to avoid any potential leaks later.


How To Fill A Planter Box
It is always good practice to wait about 24 hours for the silicone and polyurethane to cure completely before moving on to this step. Once the planter box is fully cured and dry, we can add or rocks to create the drainage layer. I went with slate chips because they are generally inert and shouldn’t affect the PH of the soil as the sitting water evaporates back up into the substrate. Here’s a really good article on slate rocks if you would like to know more about the properties of this rock… As well as how it will further contribute to the planter box.
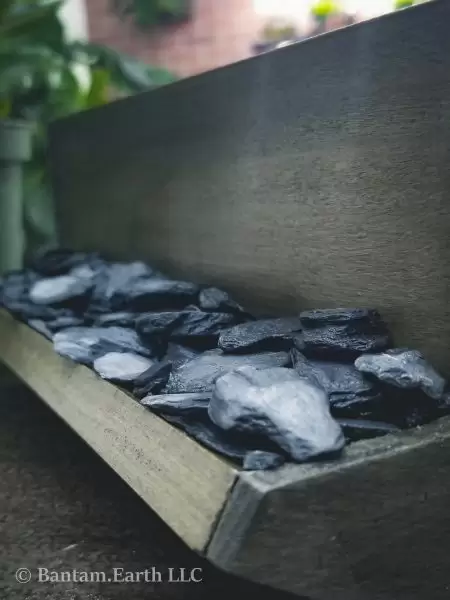

I begin adding the rocks into the box. Pouring it evenly across the bottom until it reaches the bottom of the front panel. Place a couple of smaller pieces on the outside of the tray to cover up the entrance of the tray. This will help keep the soil from falling out later. The goal here is to have the rock layer lower inside the box.


Next, I begin adding a thin layer of the substrate inside the box until it even matches up to the height of the rocks in the outer tray. Some might argue it would be better to add a substrate divider here before placing soil to avoid root rot. To each its own but I personally think that the slate rocks will be difficult for most plants to root through. Furthermore, the fallen soil will help the rest of the substrate make physical contact with the standing water under the rocks. Plus we are working with a fen that doesn’t have a strong root structure (it’s an epiphyte) and needs the substrate CONSTANTLY kept moist.
Replanting In A Planter Box
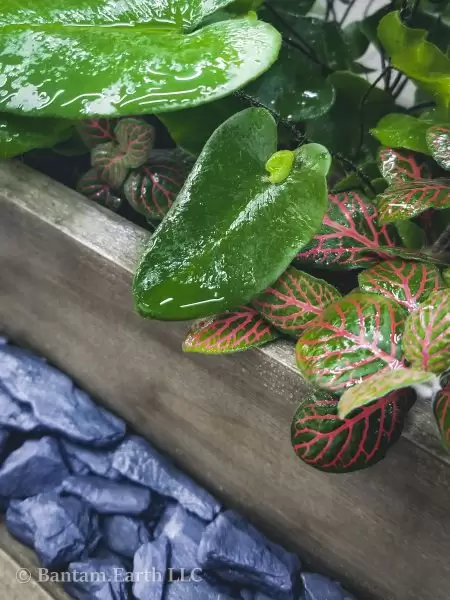
Time to add our centerfold plant. Hemionitis Arifolia or better known as the Heart Fern plant, are rather delicate plants compared to other ferns. I like to keep this plant in whatever substrate it comes in and just add more. Since I had a full-grown heart fern to work with, I didn’t have to add much soil to the planter box once I took it out the pot and moved it over. With the extra space around the base of the plant, I covered it with Sheet Moss and added a couple of Nerve Plant trimmings. Try not to pack the soil keeping it loose for new ferns to sprout through. The edges I added sheet moss to are intentionally there to keep the heart ferns growth concentrated in one spot of the planter box.

Mounting Your Planter Box
Now that our Planter box is completed, there are a couple of areas we could place it. The plant selection we went with is all pretty much low light tolerate plants intended for indoor use. If you wanted to use this planter box outside or on a window sill, you could… Just be mindful of the plants coming in direct contact with sunlight. The location of this planter will also have to be a rather humid spot so close to an air conditioner or a dry room may not work out well for these specific plants.
Placing It On A Flat Surface
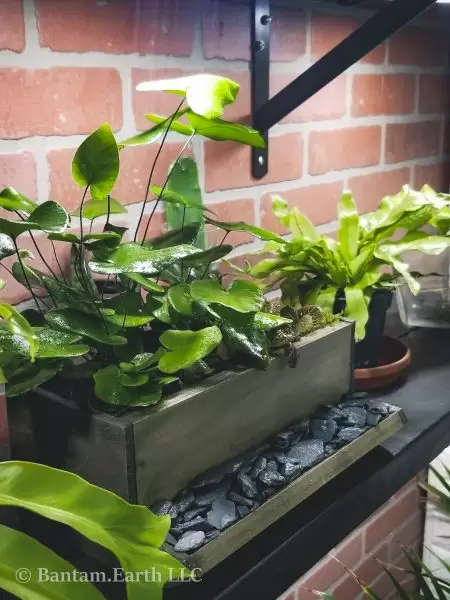
While preparing the wall for mounting this planter box, I found that it looked pretty good as-is just placing it on a shelf. If you decide to go with this type of setup… Tabletops and shelves are very suitable locations for these DIY projects.

Hanging A Planter Box
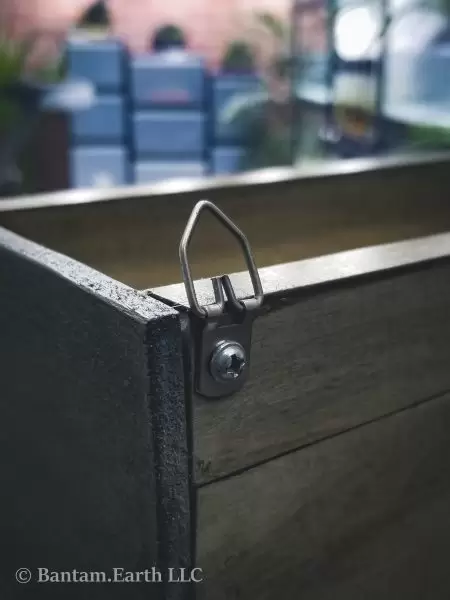
I added two Hole D Ring Hangers to the back of the planter box. Placing it on screws I pre-drilled into my faux brick wall. This makes it easy for me to take down later if I decide to replant, prune, or relocate the planter box for whatever reason. Watering is always easy since the tray is built into this type of planter.

Final Thoughts
So far, its been about a week and everything has worked out well for the plants in the wall-mounted planter box. I can easily check for water around the rocks without disturbing the delicate Heart Fern plant. This was a nice twist from my usual terrarium projects. If you are considering a craft project like this at some point in time, I think these make great house warming gifts as well as a neat way to spruce up unique houseplants.
