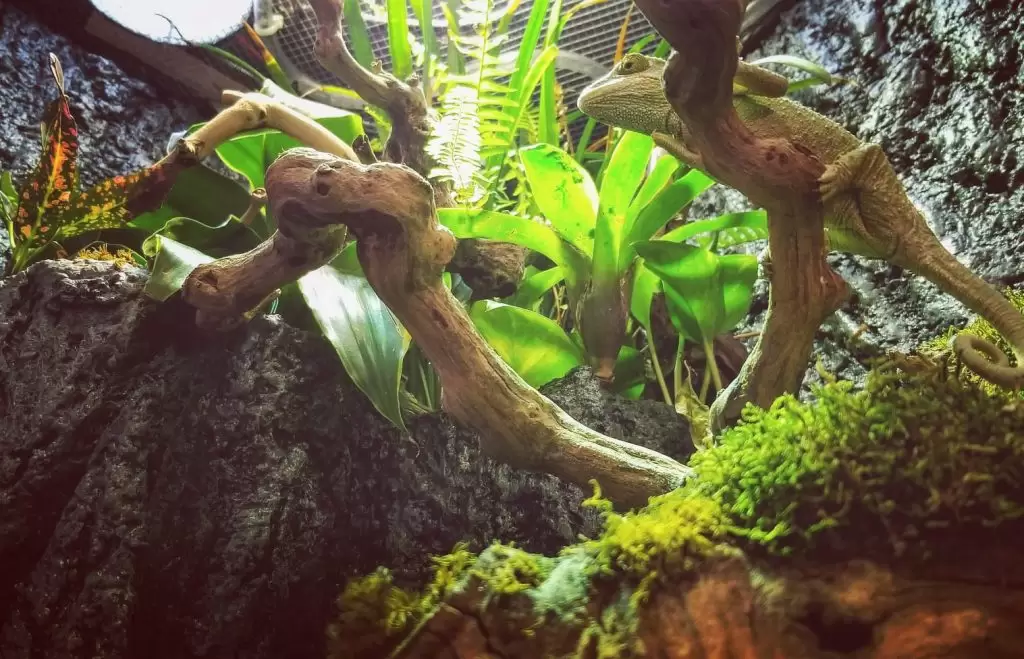
This part of the build was the most exciting for me. The concept of having an interchangeable sky system in my terrarium was terrifying and pioneering at the same time. What I wanted to do hadn’t really been done yet.
Not only did I want to automate a realistic day and night setting for Edens.Bow… I wanted different types of weather conditions as well. Rather it is a sunny day, a rainy day… Or maybe just a cloudy afternoon with light winds!
I knew if I pulled this off I would be capable of mimicking any time of the day I experienced here in Florida! (Lucky for me I don’t have to worry about bringing snow to the paludarium… Something to consider for another build maybe)
Terrarium Lighting For Plants


The most obvious part of the lighting project in this build was providing photosynthesis to the plants. After a bit of research, I concluded one solid color strip of LEDs would do the job well enough. A cool blue strip of LEDs would not only look like the sky but would cover most of the color spectrum I’d need to keep my plants alive!
Lighting For Reptiles


If you’re building with the intention of housing reptiles later, heating and vitamin D absorption are very important things to consider as well. Not receiving healthy amounts of sun can result in major health issues later… Like Metabolic Bone Disease.
After doing some shopping around, I ran across the perfect all-in-one bulb. This bulb provided heat, UVB, and UVA. It’s about as close as this Paludarium will get to harness the power!
Lighting The Aquarium
The final obstacle was figuring out how I’d get adequate amounts of light into the aquarium while still looking natural. Remember, the land base covers the majority of the aquarium top and sits a couple of inches directly in the water. Keeping the lights in a safe dry place was the priority here.
What I ended up finding was that the same LED strips that would light up the terrarium could work in the aquarium as well. The neat part about these strips is they don’t require a lot of space and remain pretty cool throughout the day. That means tucking them around the rim of the aquarium pretty much solved the lighting problem as well as concealing their location.
Building Skylights For The Paludarium
So now that we have an understanding of how and what we will illuminate the paludarium with, let’s jump right into the build!
Materials:
- Mega2560 Ultimate Starter Kit – I would highly recommend getting this kit. If you are considering going with a clone Mega2560 board, this kit will come with most of the parts used to build this paludarium. I will put (**) next to the items this kit includes so you know what you will still need to consider getting if you choose to order this kit. I will put (*) to indicate the kit comes with an alternative item that isn’t that part but could be substituted to work. https://amzn.to/2LqQ43e
- Arduino Mega2560 board* – This is the micro-controller board I decided to go with. A clone should work as well but shop at your own risk. https://amzn.to/2Lm0hha
- Power Supply Module** – It’s best to power everything separate from the board. Just make sure it is all connected through the ground wire on the breadboard. https://amzn.to/2uOEp3X
- Power Adapter – You will need two of these, one for the board and one for the breadboard if your Arduino doesn’t come with one already. https://amzn.to/2LrVdYY
- Breadboard Kit** – If you decide not to go with the starter kit, I’d recommend getting at least this kit. It comes with a breadboard, jumper wires, and resistors… Plus a couple of other little odds and ends that will come in handy later. https://amzn.to/2OgwFjf
- LED Strip Kit – Most kits you will find come with more LED’s than you will need, remote control and dimmable presets. https://amzn.to/2LP6myQ
- Solder-able Breadboard – Once you are ready to install the electronics into the tank, It would be highly recommended you solder everything down into one of these boards… I learned this the hard way and had to do it later when I started having faulty wire issues with the LEDs. https://amzn.to/2mMk0b3
- N-Channel Power Mosfet – These little guys will handle the power Arduino can’t. You will need eight of these. https://amzn.to/2Oj619B
- 3/4 in. PVC pipes – About one yard of this should be enough to work with. https://amzn.to/2NKX6wp
- 16g Speaker Wires – You will need plenty of this to run lines to and from the lights. https://amzn.to/2JXfz6q
- Exo Terra Solar-Glo – This is an amazing all in one solution to our sun. https://amzn.to/2NI71mw
- Lamp Dome – I used this one to hold the sunlight. https://amzn.to/2A7vgZj
- Dual Lamp Dome – I used two of these guys to hold my LED’s: https://amzn.to/2NMkb1H
- Outdoor LED Kit – Any color lights you like. https://amzn.to/2Llr9Ot
Tools:
- Arduino IDE Software – This is the software you will use to write and send the code to the Arduino board. You can download it for free here
- Soldering Iron Kit – This is going to be extremely handy when it’s time to lock down the wires and keep them from moving later. https://amzn.to/2Lr3bS9
- PVC Pipe Cutter – This will make cutting the pipe much easier. Stove heating a metal knife works just as well too! https://amzn.to/2OcHWkF
Making A Realistic Sun For Heat & Vitamin D Absorption
Since this is the most plug-and-play part of the install, let’s start with the sun.
- Go ahead and connect the bulb to its housing and hang it at the very top of the paludarium.
- It’s very important that the bulb doesn’t come in contact with any wires or the mesh. It should be about 6in away from the highest point any reptile can climb.
- Once in a safe position, we can plug it into the power outlet assigned to the proper relay switch so that we can control the sun’s power from the menu later.


DIY LED Skylight To Replicate Daytime & Provide Photosynthesis
What’s the sun without its sky? There are a number of ways I think one could achieve a powerful vivarium lighting system. Here’s what I did to achieve the functional natural lighting system in Edens.bow:
- Let’s start by creating a coil-like bulb that will operate as one in each of the reptile lamp housing sockets. Cut off four separate pieces of PVC pipe measuring the height of the inner lamp housing. You want it to fit into the socket well leaving enough room to roll a strip of LEDs around the outside of the pipe.


- Now cut out four equal strips of led in length and stick them around the pipe.
- Solder about a foot of wire from the closest end of the LED’s facing the roof of the lamp housing and run them out of one of the ventilation holes at the top so we can connect them to the breadboard later.
- Once all four pipes are connected and wired, you can hold them in place with silicone.
- I covered the face of the lamp with a piece of wax paper to help diffuse the light evenly throughout the terrarium and provide a more realistic look of the sky when viewing the paludarium.


- Once the lamp housing is setup up safely around the basking light I crimped speaker wire long enough to reach my breadboard and labeled them appropriately so I knew which went where later for the Arduino configuration.
Mimicking A Starry Night Sky & Moon Casting With LED’s


This was a bit easier to set up compared to the skylight. One foot long strip of LEDs would act as the moonlighting at night so the tank wasn’t completely dark. I wanted to use a series of scattered warm white LEDs to mimic stars around the top of the cage. This greatly added to the realism of the paludarium but of course, isn’t necessary.
- I started by cutting out about 15 LEDs in a string from the x-mas lights and placed them randomly around the top of the cage. They fit perfectly in the chicken wire.
- I crimped enough speaker wire from the string of lights down to the breadboard and labeled them for configuration later.
- The moonlight was a simple foot long piece of cool white LED strip that nicely sticks to the top corner edge of the plexiglass. Make sure it’s facing inwards so that it creates a nice silhouette at night when on.
- That strip was soldered to a piece of wire long enough to reach the breadboard and was labeled as well.
Lighting The Aquarium With LED’s


This was a bit tricky at first and required some experimenting. I ended up using two long strips of LEDs that alternate depending on the time of day. During the day, the top strip would brightly light up the aquarium and look as if naturally coming from the sky. The bottom strip of lights would faintly light up the gravel at night giving the tank a seductive luminous look while complimenting the moonlight.
- I started with the bottom strip of LEDs first. Measuring the span of the front glass, I cut and soldered a strip and tucked it neatly around the rim of the tank.
- Silicone was placed around the trim to keep the lights dry and help conceal the lights from sight.
- The top strip was cut and soldered the same way and tucked around the top of the trim.. waterproofing this strip could easily be done with a coat of silicone.
- Both strips have a wire running to the breadboard and are labeled as well for the next step.
Additional UVB Lighting For Reptiles
I later realized, that with a turtle occupying the middle range of the paludarium… The sun was too far to provide the needed UVB light. I simply added a small clip-on lamp with a UVB light bulb to the side of the tank. It can easily be adjusted but usually points to the turtle’s favorite basking spot to dry off. If you noticed in the menu settings, there was an additional item labeled “Bask Control”. When we plug this lamp up to the correct outlet, IT will be controlled by this menu setting.


Updating The Menu Settings With Paludarium Skylights
We have the ability to make all types of lighting conditions now. With an updated menu system, I want to create a user-friendly base anyone can cycle through various times of the day. We will now create morning, noon, evening, and night lighting conditions. As a bonus, I even through in a custom storm setting that will have rolling clouds and random flashes of lightning (the lightning feature will only work with sound since it strikes whenever thunder sounds are sensed by Arduino).
- Now that the lights are in place, we need to connect them to the appropriate place on the breadboard and run it to the Arduino. Use the schematic diagram as a guideline:


- Let’s start by defining the new pins the lights are connected to. Add this code to the top:
#define StormLED  10
#define StarsLED  9
#define Fish1LED  8
#define Fish2LED  7
#define SkyL1LED  6
#define SkyL2LED  5
#define SkyL3LED  3
#define SkyL4LED  2
- We have a new set of variables to add as well with this code:
//Read LED values
int StormLEDPos = 0;
int StarsLEDPos = 0;
int FishLED1Pos = 0;
int FishLED2Pos = 0;
int SkyL1LEDPos = 0;
int SkyL2LEDPos = 0;
int SkyL3LEDPos = 0;
int SkyL4LEDPos = 0;
//Store LED values
int StormLEDSet = 0;
int StarsLEDSet = 0;
int FishLED1Set = 0;
int FishLED2Set = 0;
int SkyL1LEDSet = 0;
int SkyL2LEDSet = 0;
int SkyL3LEDSet = 0;
int SkyL4LEDSet = 0;
//Storm Values
unsigned long previousCloudMillis = 0;
unsigned long CloudInterval = 2000; //Desired wait time
unsigned long CloudreadTime = 0;
int CloudBrightness = 0;
int StormSpeed = 1;
int CloudBrightnessMax = 35;
int CloudBrightnessMin = 10;
- Let’s go ahead and assign those new light pins as output signals in the “setup” void:
//assign LED pins as output signal
  pinMode(StormLED,OUTPUT);
  pinMode(StarsLED,OUTPUT);
  pinMode(Fish1LED,OUTPUT);
  pinMode(Fish2LED,OUTPUT);
  pinMode(SkyL1LED,OUTPUT);
  pinMode(SkyL2LED,OUTPUT);
  pinMode(SkyL3LED,OUTPUT);
  pinMode(SkyL4LED,OUTPUT);
- Now we can create the new menu options. Set up these four voids for the sky menu and lights to interact correctly:
void SkyMenu(){
  switch (subpage2_counter) {

    case 1:{
      morning();
    }
    break;
    case 2: {
      noon();
    }
    break;
    case 3: {
     evening();
    }
    break;
    case 4: {
     night();
    }
    break;
     case 5: {
     storm();
    }
    break;
    case 0: {
     TurnOffSky();
    }
    break;
  }
}
-----------------------
 SUB MENU SETTINGS
------------------------
void morning(){
  lcd.setCursor(5,2);
  lcd.print(" Morning");
  StormLEDSet = 0;
  StarsLEDSet = 0;
  FishLED1Set = 15;
  FishLED2Set = 0;
  SkyL1LEDSet = 65;
  SkyL2LEDSet = 65;
  SkyL3LEDSet = 65;
  SkyL4LEDSet = 65;
}
void noon(){
  lcd.setCursor(5,2);
  lcd.print("  Noon  ");
  StormLEDSet = 0;
  StarsLEDSet = 0;
  FishLED1Set = 65;
  FishLED2Set = 0;
  SkyL1LEDSet = 200;
  SkyL2LEDSet = 200;
  SkyL3LEDSet = 200;
  SkyL4LEDSet = 200;
}
void evening(){
  lcd.setCursor(5,2);
  lcd.print(" Evening");
  StormLEDSet = 0;
  StarsLEDSet = 0;
  FishLED1Set = 25;
  FishLED2Set = 1;
  SkyL1LEDSet = 25;
  SkyL2LEDSet = 25;
  SkyL3LEDSet = 25;
  SkyL4LEDSet = 25;
}
void night(){
  lcd.setCursor(5,2);
  lcd.print(" Night  ");
  StormLEDSet = 2;
  StarsLEDSet = 1;
  FishLED1Set = 0;
  FishLED2Set = 5;
  SkyL1LEDSet = 0;
  SkyL2LEDSet = 0;
  SkyL3LEDSet = 0;
  SkyL4LEDSet = 0;
}
void storm(){
  lcd.setCursor(5,2);
  lcd.print(" Storm  ");
  StormLEDSet = 0;
  StarsLEDSet = 0;
  FishLED1Set = 5;
  FishLED2Set = 5;
  SkyL1LEDSet = 255;
  SkyL2LEDSet = 255;
  SkyL3LEDSet = 255;
  SkyL4LEDSet = 255;
}
void TurnOffSky(){
  lcd.setCursor(5,2);
  lcd.print("                 ");
  StormLEDSet = 0;
  StarsLEDSet = 0;
  FishLED1Set = 0;
  SkyL1LEDSet = 0;
  SkyL2LEDSet = 0;
  SkyL3LEDSet = 0;
  SkyL4LEDSet = 0;
}
void clearSkyMode(){
 //--------------------------------
//    LIGHTS
//--------------------------------
  if(StormLEDPos != StormLEDSet){
    if(StormLEDPos < StormLEDSet){ StormLEDPos++; analogWrite(StormLED,StormLEDPos); } else if(StormLEDPos > StormLEDSet){
      StormLEDPos--;
      analogWrite(StormLED,StormLEDPos);
    }
  }
  if(StarsLEDPos != StarsLEDSet){
    if(StarsLEDPos < StarsLEDSet){ StarsLEDPos++; analogWrite(StarsLED,StarsLEDPos); } else if(StarsLEDPos > StarsLEDSet){
      StarsLEDPos--;
      analogWrite(StarsLED,StarsLEDPos);
    }
  }
  if(FishLED1Pos != FishLED1Set){
    if(FishLED1Pos < FishLED1Set){ FishLED1Pos++; analogWrite(Fish1LED,FishLED1Pos); } else if(FishLED1Pos > FishLED1Set){
      FishLED1Pos--;
      analogWrite(Fish1LED,FishLED1Pos);
    }
  }
   if(FishLED2Pos != FishLED2Set){
    if(FishLED2Pos < FishLED2Set){ FishLED2Pos++; analogWrite(Fish2LED,FishLED2Pos); } else if(FishLED2Pos > FishLED2Set){
      FishLED2Pos--;
      analogWrite(Fish2LED,FishLED2Pos);
    }
  }
  if(SkyL1LEDPos != SkyL1LEDSet){
    if(SkyL1LEDPos < SkyL1LEDSet){ SkyL1LEDPos++; analogWrite(SkyL1LED,SkyL1LEDPos); } else if(SkyL1LEDPos > SkyL1LEDSet){
      SkyL1LEDPos--;
      analogWrite(SkyL1LED,SkyL1LEDPos);
    }
  }
  if(SkyL2LEDPos != SkyL2LEDSet){
    if(SkyL2LEDPos < SkyL2LEDSet){ SkyL2LEDPos++; analogWrite(SkyL2LED,SkyL2LEDPos); } else if(SkyL2LEDPos > SkyL2LEDSet){
      SkyL2LEDPos--;
      analogWrite(SkyL2LED,SkyL2LEDPos);
    }
  }
  if(SkyL3LEDPos != SkyL3LEDSet){
    if(SkyL3LEDPos < SkyL3LEDSet){ SkyL3LEDPos++; analogWrite(SkyL3LED,SkyL3LEDPos); } else if(SkyL3LEDPos > SkyL3LEDSet){
      SkyL3LEDPos--;
      analogWrite(SkyL3LED,SkyL3LEDPos);
    }
  }
  if(SkyL4LEDPos != SkyL4LEDSet){
    if(SkyL4LEDPos < SkyL4LEDSet){ SkyL4LEDPos++; analogWrite(SkyL4LED,SkyL4LEDPos); } else if(SkyL4LEDPos > SkyL4LEDSet){
      SkyL4LEDPos--;
      analogWrite(SkyL4LED,SkyL4LEDPos);
    }
  }
}

void cloudySkyMode(){
   if(SkyState !=5){
     SkyState = 5;
    }
  if(StarsLEDPos != StarsLEDSet){
    if(StarsLEDPos < StarsLEDSet){ StarsLEDPos++; analogWrite(StarsLED,StarsLEDPos); } else if(StarsLEDPos > StarsLEDSet){
      StarsLEDPos--;
      analogWrite(StarsLED,StarsLEDPos);
    }
  }
  if(FishLED1Pos != FishLED1Set){
    if(FishLED1Pos < FishLED1Set){ FishLED1Pos++; analogWrite(Fish1LED,FishLED1Pos); } else if(FishLED1Pos > FishLED1Set){
      FishLED1Pos--;
      analogWrite(Fish1LED,FishLED1Pos);
    }
  }
   if(FishLED2Pos != FishLED2Set){
    if(FishLED2Pos < FishLED2Set){ FishLED2Pos++; analogWrite(Fish2LED,FishLED2Pos); } else if(FishLED2Pos > FishLED2Set){
      FishLED2Pos--;
      analogWrite(Fish2LED,FishLED2Pos);
    }
  }
//--------------------------------
//    LIGHTNING
//--------------------------------
  if(StormLEDPos != StormLEDSet){
    if(StormLEDPos < StormLEDSet){ StormLEDPos++; analogWrite(StormLED,StormLEDPos); } else if(StormLEDPos > StormLEDSet){
      StormLEDPos--;
      analogWrite(StormLED,StormLEDPos);
    }
  }
//--------------------------------
//    CLOUDS
//--------------------------------
unsigned long currentCloudMillis = millis();            //call current millis

  if (currentCloudMillis - previousCloudMillis > CloudInterval) {  //If interval is reached :

     previousCloudMillis = currentCloudMillis;                   //replace previous millis by current millis as new start point
     CloudreadTime++;                                  //do something
     Serial.println(CloudreadTime);
     }

   if(SkyL1LEDPos == CloudBrightness && CloudreadTime == 1){
    if(CloudBrightness >= CloudBrightnessMax){
      CloudBrightness = CloudBrightnessMin;
    }
    else if(CloudBrightness <= CloudBrightnessMin){
      CloudBrightness = CloudBrightnessMax;
    }
    CloudreadTime = 0;
  }
  //----------Cloud 1------------
 else if (SkyL1LEDPos != CloudBrightness){
    if(SkyL1LEDPos < CloudBrightness){ SkyL1LEDPos += StormSpeed; analogWrite(SkyL1LED,SkyL1LEDPos); CloudBrightness = CloudBrightnessMax; } else if(SkyL1LEDPos > CloudBrightness){
      SkyL1LEDPos -= StormSpeed;
      analogWrite(SkyL1LED,SkyL1LEDPos);
      CloudBrightness = CloudBrightnessMin;
    }
  }
  //----------Cloud 2------------
  if (SkyL2LEDPos != CloudBrightness){
    if(SkyL2LEDPos < CloudBrightness){ SkyL2LEDPos += StormSpeed +1; analogWrite(SkyL2LED,SkyL2LEDPos); } else if(SkyL2LEDPos > CloudBrightness){
      SkyL2LEDPos -= StormSpeed +1;
      analogWrite(SkyL2LED,SkyL2LEDPos);
    }
  }
  //----------Cloud 3------------
 if (SkyL3LEDPos != CloudBrightness){
    if(SkyL3LEDPos < CloudBrightness){ SkyL3LEDPos += StormSpeed +2; analogWrite(SkyL3LED,SkyL3LEDPos); } else if(SkyL3LEDPos > CloudBrightness){
      SkyL3LEDPos -= StormSpeed+2;
      analogWrite(SkyL3LED,SkyL3LEDPos);
    }
  }
  //----------Cloud 4------------
  if (SkyL4LEDPos != CloudBrightness){
    if(SkyL4LEDPos < CloudBrightness){ SkyL4LEDPos += StormSpeed +1; analogWrite(SkyL4LED,SkyL4LEDPos); } else if(SkyL4LEDPos > CloudBrightness){
      SkyL4LEDPos -= StormSpeed +1;
      analogWrite(SkyL4LED,SkyL4LEDPos);
    }
  }
}
- Lastly, we will add this line of code to the “loop” void to activate it accordingly:
if(subpage2_counter < 5){ clearSkyMode(); } else{ cloudySkyMode(); } - We can now verify the code and upload it to the Arduino board!


Conclusion
“Now let there be light!!” At this point, everything should be working except for the lightning strikes… There is a perfectly good reason for this, we need to set up the paludarium’s sound!


Comments are closed.