Making A Glow-In-The-Dark Terrarium Last Updated on: 08/24/2024 by CJ Abney TweetPinShareShareShare Hey guys, welcome back to another Bantamarium experience. As usual, I’m pumped up and ready to present my latest offerings to you! Today I’m going to show you how to make your very own glow-in-the-dark terrarium with an adorable glamor campsite. If you know nothing about glamping, you’re in the right place… because I don’t either… let’s make a terrarium! 
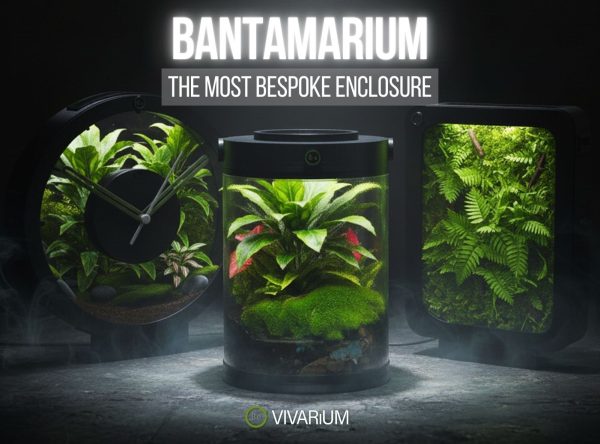
If you’re new to the concept of a Bantamarium, I highly recommend checking out the detailed guide I’ve created. In essence, a Bantamarium is a versatile vivarium designed to bring miniature ecosystems to life. It’s a concept I’ve developed to make it easier for anyone—regardless of experience level—to create a thriving, visually stunning vivarium that blends art with nature. Table Of Contents: Toggle Glamour Camping In A TerrariumHow To Make A Glow-In-The-Dark TerrariumGlow-in-the-dark Terrarium AnimalsGlow-in-the-dark Terrarium CareFinal Thoughts Glamour Camping In A Terrarium Glamping is the combination of two words, “glamorous” and “camping” and is basically enjoying the outdoor encounter but with amenities. The traditional style of surviving off of the land is traded in with a more resort-style experience… I tried to capture that in this diorama and made today’s video compliment the vibe I was going for with this DIY glow-in-the-dark terrarium. How To Make A Glow-In-The-Dark Terrarium So we have our work cut out for us with this one. It's not going to be a challenging project by any means. We are just going to have to take careful consideration about how we prepare things to ensure a safe environment for whatever plants and animals may call this bantamarium, home. Here's what we will need to create our glow-in-the-dark terrarium. This project is now available as a complete kit! Check out available sizes: Total Time Needed: 1 hour, 30 minutes Materials: -Mini Bantamarium Jar 4.5″ x 4.75″ -Glamour Camping Set -Carpeting Moss -White Gravel -White Sand -Coco Coir Soil -Reindeer Moss (Green) -Birch Twigs (Optional) -Aquascaping Tool Kit Steps to building the Glow-In-The-Dark terrarium: Step 1: Pick Out The Glamour Campsite Terrarium Decor At the time this tutorial was written, I offered these models unpainted and unassembled. we are proud to announce that our terrarium decor has been improved since then and is now available completed with color. If you so choose to add personalized details, these models are still paintable. Just remember to properly seal them with an aquarium-safe sealant and allow it to cure before use. Step 2: Setup The Drainage Layer Start by pouring gravel into the vase. You should be aiming for a layer at least an inch deep. This is where all of our excess water will go after each watering or mist. I'm using red gravel because it looks very earth clay layer-ish, but for the completed kit I felt like the white base fit the overall aesthetics better. Step 3: Separate The Drainage Layer From The Substrate I recommend using some type of screen mesh to separate this layer from the substrate layer. This helps keep the soil out of the stagnant water. I'm using a small piece of garden liner for this. Step 4: Add Sand & Soil To Make Up The Substrate Layer Next, we can add our substrate layer. I decided to try something different with the layering of sand and soil. There's a bit of an illusion going on with this. I only apply the layers of sand on the out rim of the tank to give the effect the whole terrarium is layered. After a couple of layers, I top off the substrate with the intended soil. Step 5: Add The Carpeting Moss At this point, I give everything a nice misting and proceed to sprinkle shredded carpeting moss around the whole enclosure. This is going to look phenomenal after a couple of weeks of acclimation. Step 6: Arrange The Campsite Decor We can now start to arrange our glamor campsite decor around the terrarium. The first piece going in will be the large tent as it will set the scape for the rest of the scene. Step 7: Added Sticks For A Wooded Scene (Optional) Once the decor is in place, twigs are placed around the background to set up the structure for our wooded area. Step 8: Start Adding The Reindeer Moss The wooded forest is topped off with real tree lichen. This stuff grows all over my neighborhood and really adds a touch of realism to trees. It also grows really slow and pulls its nutrients from the air so I don't have to water them directly. Glow-in-the-dark Terrarium Animals Several micro critters could do well in this type of terrarium. I’m a huge fan of animals that help maintain the terrarium. Springtails, isopods, or even a small colony of ants would fit this enclosure nicely. For this terrarium, I will be looking to add something unique. Stay tuned for updates on this if you follow me on any of my social media. Glow-in-the-dark Terrarium Care As with most of my miniature terrariums, this tank should do well on its own. As things grow, the natural takeover will only further enhance the scenery. If you haven’t already, mist down the scape and seal it with a little plastic wrap. Open it every once in a while so that the lichen can get fresh air. Lichen receives its nutrients from the air so it’s vital it gets a nice breather from time to time. Final Thoughts With things completed, I’m sure you’ve already flicked the lights on and off several times to enjoy the cool effects this unique jarrarium offers. Regardless if you used my decor for this project or not, if you felt inspired enough to create your own DIY glow-in-the-dark terrarium, I’d love to see it so tag me when you post it! Until then, see you all at the next one… If you’re interested in seeing updates on how this as well as other enclosures progress follow me on social media. If you’d like to get your tall tweezers on one of these limited edition vivarium decors yourself, check them out in our shop. TweetPinShareShareShare More In Make: