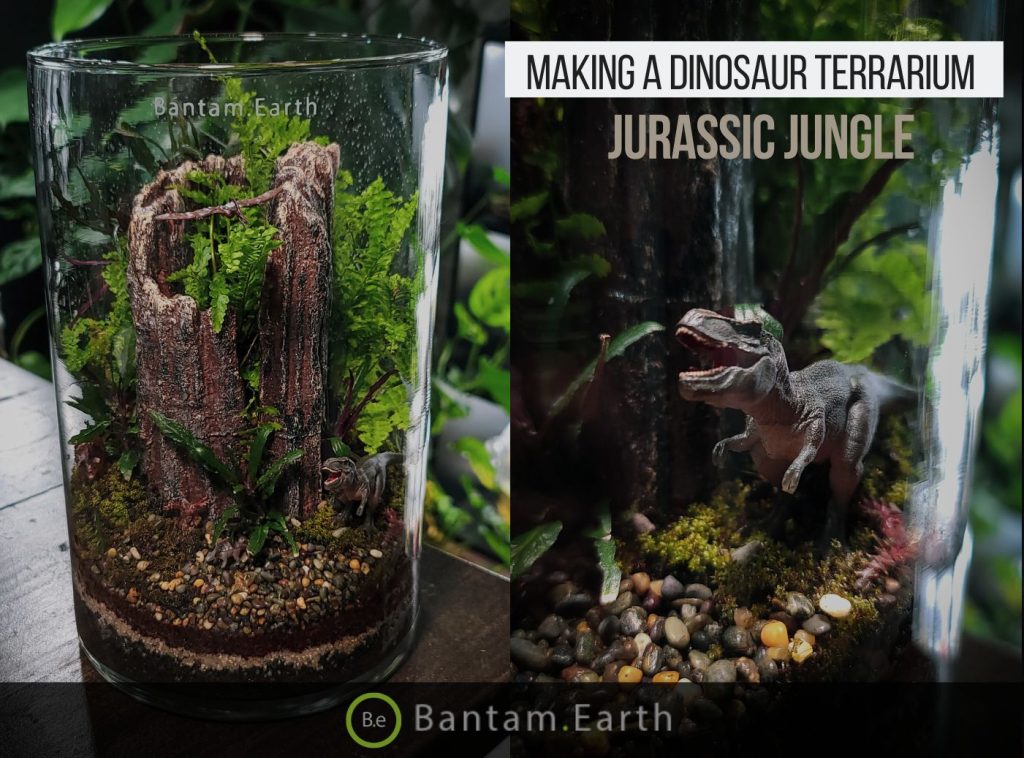
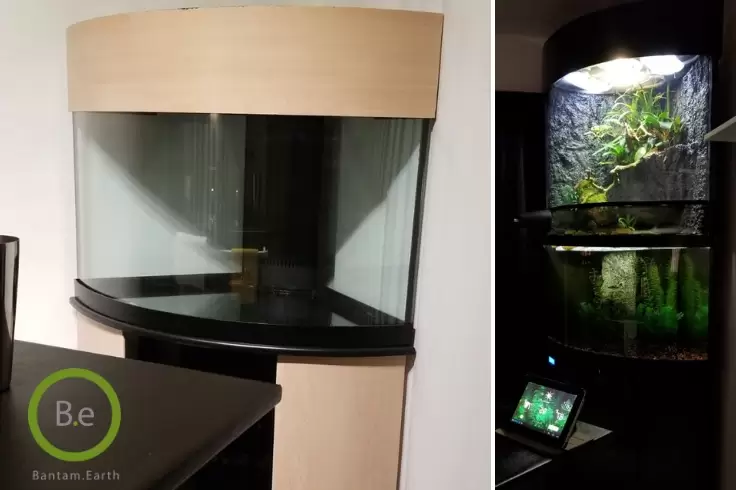
Looking to build a paludarium for yourself? Today I will explain how to build a paludarium like Edens.Bow! This 8-foot paludarium was originally a 55-gallon aquatic tank. It was being used as a saltwater aquarium. Everything appeared to be in good shape and working well. I broke it down completely and thoroughly cleaned and sterilized every piece I could reach.

Before we start, I know that Edens.Bow turned out to be a pretty complex project in a whole. So for those looking for a more basic introductory to paludariums and how to build one on a more basic scale, be sure to check out the article here: Paludarium
Build a Paludarium: The Design Process
Once I got it all back together, it was time to figure out what type of setup I was going to do. A paludarium was always the intention when I got the tank. I just wasn’t sure exactly how it would be done initially.


The Template
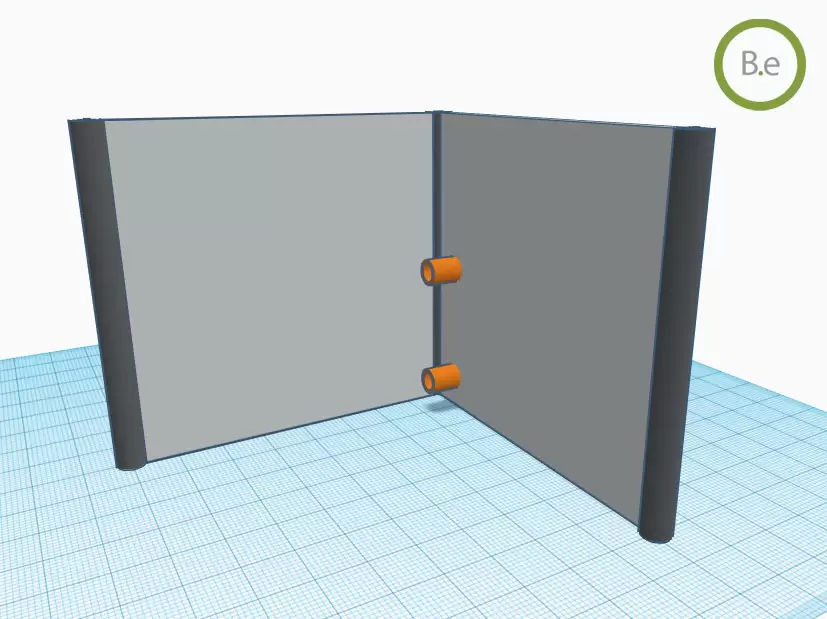
After deciding to build a paludarium, I sketched out a few templates. Ultimately, I decided the plan would be to extend the top of the tank and build it up to the ceiling. This is what I came up with:
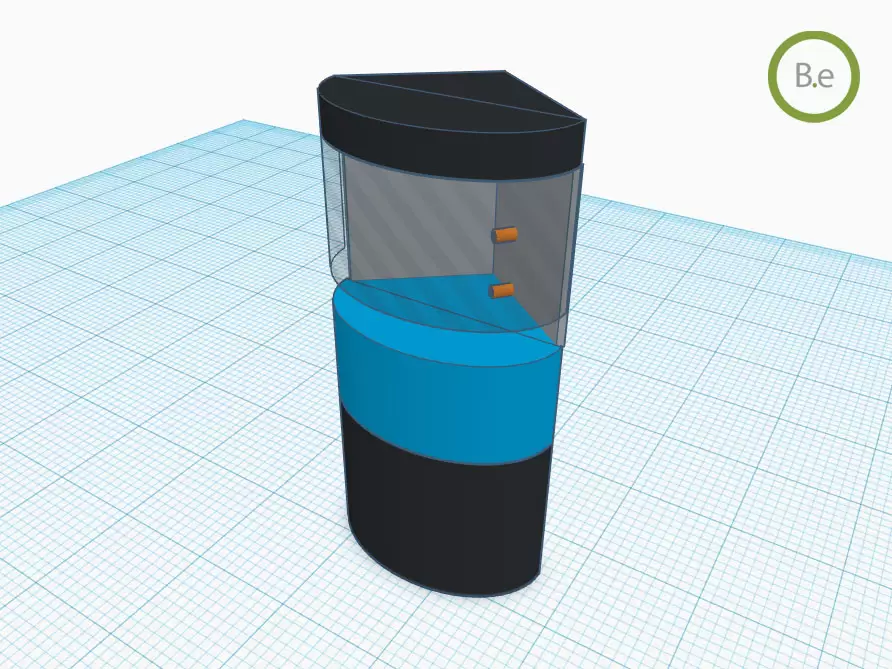

Since the upper lid cover completely comes off of the original set up, I figured I would use it as a sort of guideline. My idea was to build the entire terrarium in between the bottom of the lid cover and top of the aquarium.
The Plumbing
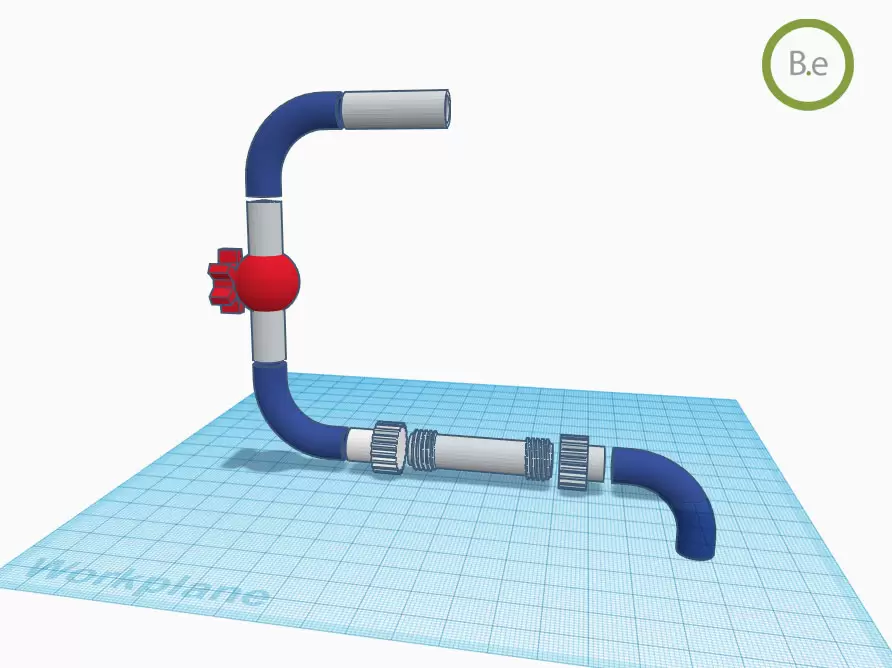
Nothing would change as far as the aquarium part, except for the plumbing. I needed to return the water out of the sump back into the main tank. I built a redirect on top of the return jets, allowing an adjustable portion of the water to flow up into the vivarium. An aquaponics-style system would need to be set up on top to cycle water into the land plant’s media.

The Frame
To build a paludarium, you first need a frame design. The mainframe supporting the terrarium would consist of metal poles, aluminum being the lightest. The bulk of the terrarium would consist of styrofoam sheets.

The Front
The open front area would be covered with a thin piece of acrylic glass. I decided to leave about four inches of open ventilation on the front between the acrylic glass and upper lid of the aquarium. I covered that with a pet screen, which makes it easier for me to reach in and clean or feed inhabitants whenever I needed to later.
The Top
Some chicken wire along with pet screen mesh on top of the terrarium under the upper lid would keep the animals secure while allowing airflow to escape through the top.
Disassembly Capability
When you build a paludarium, keep in mind that it needs to be easy to break down later for reasons like moving, relocating, etc. The entire upper half is mounted with zip ties. The plumbing has removable PVC pipes connecting the two separate pieces together.
Building The Ultimate Vivarium
After understanding how to build a paludarium and designing all pieces, I gathered my supplies and began constructing them. The goal was to build this tank within a reasonable budget and at a pace that allowed my passion to tackle this massive project to last!
Materials:
- 55 Gallon Bow Front Aquarium Tank – I think you could design this project with any style/size tank, but for this tutorial, I will use my metrics.
- Sump Filter – This type of filtration works best for this type of setup. https://amzn.to/2mK5lgT
- Submersible Water Pump – it needs to be powerful enough to push water at least 13 feet. https://amzn.to/2mHGTMT
- Acrylic Sheet – A simple sheet will due. The thinner it is, the easier to work with. It needs to be at least 26in x 43in. https://amzn.to/2OeQBmq
- Weather Stripping – We will use this to seal the top of our enclosure. https://amzn.to/2OglnLP
- Zip Ties – For various binding reasons. https://amzn.to/2uR8yj1
- Black Pet Screen -This will keep small critters from escaping. https://amzn.to/2uQYFSl
- Velcro Strips – These things make it easy to take the pet screen on and off the tank for accessibility. https://amzn.to/2Og52Xm
- Styrofoam Sheets -This is what the background will mostly consist of. https://amzn.to/2JU77oM
- 40 in Metal Round Tubes – You’ll need 3 three-foot-long metal tubes with a diameter of about 1/2 in. This will work as the frame for our terrarium housing. https://amzn.to/2NMy2VU
- Chicken Wire – This is great for keeping reptiles inside the enclosure as well as supporting the weight of lights. https://amzn.to/2uR8L5J
- 3/4 in. PVC pipes – About one yard of this should be enough to work with. https://amzn.to/2NIJwtm
- 90 Degree PVC Elbow – Four of these should be enough to articulate the redirect. https://amzn.to/2LTqqjW
- PVC Compression Coupling – One of these will make it easy to disassemble the tank later if we need to. https://amzn.to/2NLr9UD
- PVC Compact Ball Valve – This will allow us to later adjust the flow pouring into the terrarium portion of the tank. https://amzn.to/2NHl1wC
- Spray Foam – This is great for adding texture to the background as well as make the structure stronger as a whole. https://amzn.to/2LPi909
- Grout – Great for making the background more concrete. It’s also easy to paint. https://amzn.to/2LmXTqK
- Corner Trim – Two pieces 29in long each to mount the acrylic sheet to the front of our terrarium. https://amzn.to/2Lq1ggg
Tools:
- Drill – This makes it quick and easy to assemble the paludarium. https://amzn.to/2LpUvez
- Silicone – Used to seal the enclosure from leaks. https://amzn.to/2OfsLai
- Polyurethane Finish -This is used to seal the background. Silicone works better for this but a lot harder to work with. https://amzn.to/2JWz52X
- Hot Glue Gun -Used to attach various things together like the pet screen. https://amzn.to/2JVmn4H
- Paint Brushes – An assorted set would be ideal to paint the grout and colors on with. https://amzn.to/2mHmeZj
- Acrylic Paint – I went with a simple black color and white color. you can mix these for varied looks. https://amzn.to/2JVwvKw
- Spray Bottles – I found that this made it so much easier to paint base colors on with. https://amzn.to/2JV8bJ5
- Tube Expander – used to expand the ends of the metal tubes. https://amzn.to/2mIy7y7
Build a Paludarium: Constructing the Frame


Let’s start with the frame. Cut the metal tubes into 3 long pieces of about 31in long. We are going to make the two walls with the styrofoam sheets measuring out to 24in x 29in tall. For now, we can duct tape the metal tubes onto the styrofoam sheets to form a corner. (Make sure the longer ends of the tubes are sticking up. We will use that later to connect the top lid.)


Now we can use the leftover pieces of the tubes to form the lid support. Line up three 5-inch pieces in each corner of the lid. Use the tube-expander to stretch out about 2 inches deep of tube. Once zip tied into the corners, we can do a test fit to make sure it fits on the terrarium frame we made in the last step.
The frame and lid are now ready to go to the aquarium. I zip-tied corner brackets into the top of the aquarium so that the tube framing would easily stay in place on the tank.


If the corner trim pieces are cut to 29 inches, let’s go ahead and drill them into the tubes on each side. Make sure to leave just enough room to slide the Plexiglas between the corner trim and tube.


Test fit the acrylic sheet on to the frame and place the lid on top. If all fits well, we can mold and paint the terrarium.


Before you build a paludarium completely, consider setting up the plumbing before finishing the setup for the terrarium. The pipes were put together to fit right into one side of the styrofoam wall. The PVC compression coupling allowed me to seal the plumbing to the frame while easily disconnecting it from the aquarium to separate the tank for the next step.
Build a Paludarium: Terrarium Design


When you build a paludarium, you’re in the creative seat. Setting up the terrarium, I tried to think ahead about the artistic and natural features I wanted. I knew I wanted a waterfall of some sort, an aquaponics-type mountain, a coastal land that could run off into the aquarium.. oh, and a cave!
- I used pieces of styrofoam to set up the land area first and built up from there. The mountain edge is shaped like a bucket to house the media for the top plants. Therefore, I chose to place the cave directly under one of the buckets. A small hole in the 8in PVC pipe is positioned just under the waterfall. This will act as an overflow; once the buckets fill to a certain level (I left about 4 inches from the top of the PVC pipe to the top of the bucket), water will pour into the pipe and out of the waterfall. Make sure the plumbing pipe goes into the bucket, preferably an inch or two from its base.
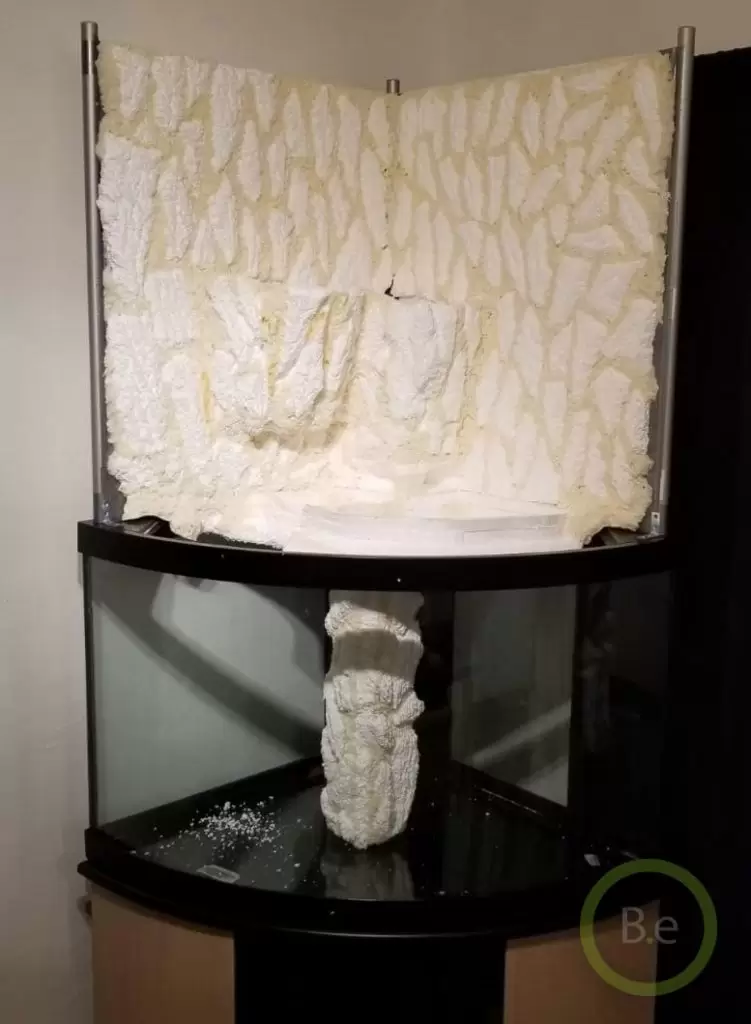
- Now that the styrofoam pieces are set up, you can use the spray foam to fill in the open areas of the bucket and land.
- Broken pieces of styrofoam are glued on the flat walls to create depth. I sprayed foam in between those pieces to add depth for the next step.
- Carving time! I plucked small pieces off the spray foam with pliers or with my fingers to create texture. This took a while and made a mess! I checked for any holes big enough to fit my fingers thru and plugged them.

Painting The Paludarium


Now that everything looks good and there aren’t any big leak areas (don’t worry about small leaks, the silicone will seal it), I applied two layers of grout.
- Things are looking more realistic, so let’s add color. In an empty spray bottle, I mixed water with a bit of black acrylic paint. I wanted it watery enough to fill all the creases and cracks.
- Mix 1 part black and 3 parts white acrylic paint to get the grey color you want and lightly brush it on the foam. I had to do it a couple of times until I got the color I wanted.
- Once satisfied, I took white paint and a small brush and feathered it across the edges to add more detail.


- If everything looks good, you can apply the polyurethane. I rubbed it over the whole thing and rubbed silicone around the areas that would be mostly wet when it ran. This includes the inner buckets and the cave. Even the land above and below should be covered in silicone.
- Now that the terrarium housing is just about complete, I made an underwater tower to help support the weight of the terrarium. Follow steps 8-16 to build this. There’s no specific way to do this; just make sure the height of it fits between the terrarium floor and the bottom of the aquarium.


- Finally, mount everything back together. Cut out the chicken wire and the pet mesh to seal the top. Installing everything except for the lid will make it easy to trace out the wire/mesh and nail it to the top of the vivarium.


Conclusion
Choosing to build a paludarium brings limitless creative opportunities. As a result, I later decided to add an ultrasonic mist-maker to the pond area. I drilled a tiny hole big enough to fit the mist-maker wire through and plugged it up. This plug & play device was very easy to hook up and super beneficial! This greatly improves the humidity and moisture for the entire terrarium.


You can choose to install a rain irrigation system. Because of my preferences, I bought another smaller water pump and placed it inside of one of the mountain chambers (the styrofoam drum at the top) and ran a clear plastic tube up to the chicken wire. I zip tied it around in a random loop pattern and poked holes at the bottom of the plastic tube every couple of inches. This has worked out pretty well with a very “random” looking rainfall. At some point, I think I will update this system to have something that looks a little more polished and concealed.
After you build a paludarium, do a test run with water and check for leaks. Furthermore, don’t mount the acrylic sheet until you are ready to add your animals. It makes it easier to rearrange things later.


