With the tank now almost complete, we are ready to add Bluetooth capabilities to it so we can control the paludarium remotely.
This is going to be a bit of a challenge explaining the app development in detail the way I have everything else. It’s my first time completing an app on my own so the process wasn’t well documented as I went developed it. I will try my best to give you guys as much detail as I can recall. The actual app development part might seem more like a recap since App Inventor has tons of really good tutorials explaining the basics. Feel free to ask me questions about anything, It helps me fill in blanks I might have missed along the way.
Remote Controlling A Paludarium
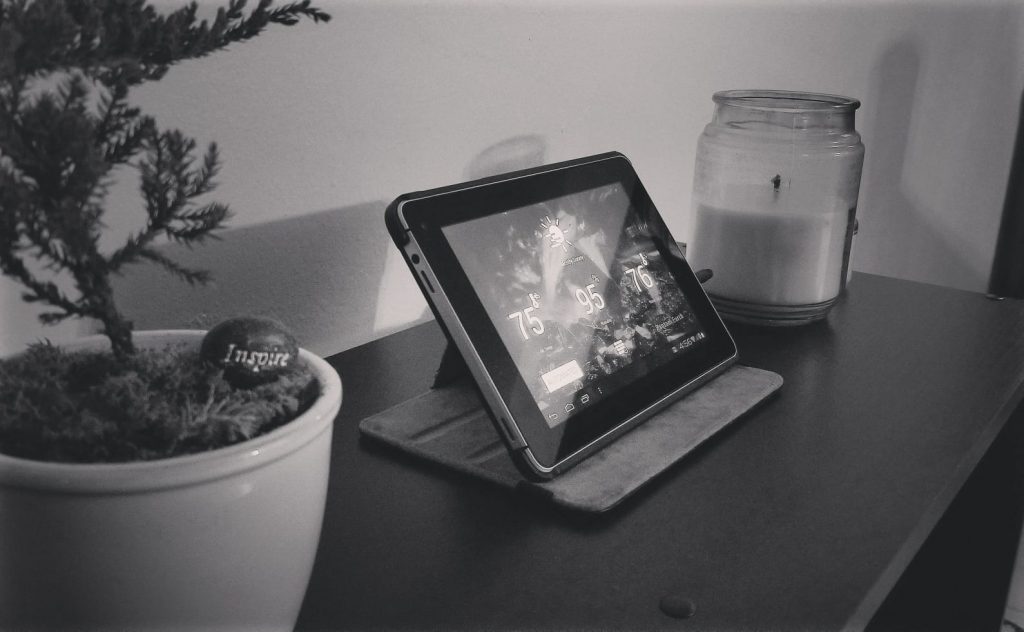

You ever heard the saying “There’s more than one way to skin a cat!”… That’s how I felt about remote controlling a paludarium. Connecting the tank via WiFi internet probably would have been the most logical thing to do. With WiFi, you could potentially connect to the tank anywhere in the world… but how easy would it have been to code an app to working completion, was the real question… My biggest worry was time, I wanted to learn a new app making program and make it work fast!
After taking a look around, I stumbled across App Inventor 2 and its simple synchronizing process to Bluetooth devices. This approach looked promising to me. App Inventor seemed complex enough to do what I wanted it to do, yet simple enough to aggressively tackle the appealing learning-curve.
Materials:
- Mega2560 Ultimate Starter Kit – I would highly recommend getting this kit. If you are considering going with a clone Mega2560 board, this kit will come with most of the parts used to build this paludarium. I will put (**) next to the items this kit includes so you know what you will still need to consider getting if you choose to order this kit. I will put (*) to indicate the kit comes with an alternative item that isn’t that part but could be substituted to work. https://amzn.to/2LqQ43e
- Arduino Mega2560 board* – This is the micro-controller board I decided to go with. A clone should work as well but shop at your own risk. https://amzn.to/2Lm0hha
- Power Supply Module** – It’s best to power everything separate from the board. Just make sure it is all connected through the ground wire on the breadboard. https://amzn.to/2uOEp3X
- Power Adapter – You will need two of these, one for the board and one for the breadboard if your Arduino doesn’t come with one already. https://amzn.to/2LrVdYY
- Breadboard Kit** – If you decide not to go with the starter kit, I’d recommend getting at least this kit. It comes with a breadboard, jumper wires, and resistors… Plus a couple of other little odds and ends that will come in handy later. https://amzn.to/2OgwFjf
- Solder-able Breadboard – Once you are ready to install the electronics into the tank, It would be highly recommended you solder everything down into one of these boards… I learned this the hard way and had to do it later when I started having faulty wire issues with the LEDs. https://amzn.to/2LP6myQ
- HC-05 Bluetooth Module – This is the module that will give our paludarium connect-ability. https://amzn.to/2NKZQKd
Tools:
- App Inventor 2 – This is the website you will be developing the App on. http://ai2.appinventor.mit.edu
- Arduino IDE Software – This is the software you will use to write and send a code to the Arduino board. You can download it for free here.
- Soldering Iron Kit – This is going to be extremely handy when it’s time to lock down the wires and keep them from moving later. https://amzn.to/2Lr3bS9
Constructing The Bluetooth Components
Once I decided to move on App Inventor, it was pretty much set in stone that the communication component would be via Bluetooth.
- The first thing we need to do is add a Bluetooth module to the Arduino Mega2560 board. This will allow the paludarium to connect with any mobile device we upload the app too. The diagram below should help guide you:


- Next, we need to update the code with Bluetooth functionality. Back when we updated the menu system we incorporated the needed codes to control the menu via Bluetooth, so let’s make sure these variables are at the top somewhere:
//Bluetooth
byte dataFromBT;
byte State;
int FanState = 0;
int FogState = 0;
int RainState = 0;
int SunState = 0;
int BaskState = 0;
int SkyState = 0;
- The Bluetooth module is set up to run on serial pin 1, let’s include this code in the “setup” void:
Serial1.begin(9600);
- Now every time the Arduino board runs the “updatestatistics” void, we want to send the mobile device those stats. Let’s place this code at the bottom of that void:
byte Air = AirTemp;
  byte Humidity = DHT.humidity;
  byte Water = WaterTemp;
  Serial1.print("Stats:");
  Serial1.print((int)Air);
  //Serial1.print(" F");
  Serial1.print("|");
  Serial1.print((int)Humidity);
  //Serial1.print(" %");
  Serial1.print("|");
  Serial1.print((int)Water);
  //Serial1.print(" F");
  Serial1.print("|");
   if(subpage2_counter == 0){
    Serial1.print("Sky Disabled");
   }
   else if(subpage2_counter == 1){
    Serial1.print("Morning");
   }
   else if(subpage2_counter == 2){
    Serial1.print("Noon");
   }
   else if(subpage2_counter == 3){
    Serial1.print("Evening");
   }
   else if(subpage2_counter == 4){
    Serial1.print("Night");
   }
   else if(subpage2_counter == 5){
    Serial1.print("Storm");
   }
  Serial1.print("StatsEnd");

  byte FanMode = FanState;
  byte FogMode = FogState;
  byte RainMode = RainState;
  byte SunMode = SunState;
  byte BaskMode = BaskState;
  byte SkyMode = SkyState;
  Serial1.print("Setts:");
  Serial1.print((int)FanMode);
  Serial1.print("|");
  Serial1.print((int)FogMode);
  Serial1.print("|");
  Serial1.print((int)RainMode);
  Serial1.print("|");
  Serial1.print((int)SunMode);
  Serial1.print("|");
  Serial1.print((int)BaskMode);
  Serial1.print("|");
  Serial1.print((int)SkyMode);
  Serial1.print("SettsEnd");
- Since the menu is already set up to do stuff when it receives a command from the app, let’s create a void that will handle those commands called “bluetooth”:
void bluetooth(){

   if(Serial1.available() > 0){ // Checks whether data is comming from the serial port
    Serial.println("you have a connection");

    dataFromBT = Serial1.read(); // Reads the data from the serial port

    State = dataFromBT;
     // Print on the Monitor latest command recieved
 }
  // Set relay states from bluetooth buttons
    if (State == '1') {
    // Turn off FAN
    page_counter=2;
    relay8_state=HIGH;
    if(FanState !=0){
      FanState = 0;
    }
    page_counter=1;
    State = 0;
  } else if ( State == '2') {
    // Turn on FAN
    page_counter=2;
    relay8_state=LOW;
    if(FanState !=1){
      FanState = 1;
    }
    page_counter=1;
    State = 0;
  }

   if (State == '3') {
    // Turn off Fog
    page_counter=3;
    relay2_state=HIGH;
    if(FogState !=0){
      FogState = 0;
    }
    page_counter=1;
    State = 0;
  } else if ( State == '4') {
    // Turn on Fog
    page_counter=3;
    relay2_state=LOW;
    if(FogState !=1){
      FogState = 1;
    }
    page_counter=1;
    State = 0;
  }

 if (State == '5') {
    // Turn off RAIN
    page_counter=4;
    relay3_state=HIGH;
    if(RainState !=0){
      RainState = 0;
    }
    page_counter=1;
    State = 0;
  } else if ( State == '6') {
    // Turn on RAIN
    page_counter=4;
    relay3_state=LOW;
    if(RainState !=1){
      RainState = 1;
    }
    page_counter=1;
    State = 0;
  }

if (State == '7') {
    // Turn off SUN
    page_counter=5;
    relay4_state=HIGH;
    if(SunState !=0){
      SunState = 0;
    }
    page_counter=1;
    State = 0;
  } else if ( State == '8') {
    // Turn on SUN
    page_counter=5;
    relay4_state=LOW;
    if(SunState !=1){
      SunState = 1;
    }
    page_counter=1;
    State = 0;
  }

if (State == '9') {
    // Turn off BASK
    page_counter=6;
    relay5_state=HIGH;
    if(BaskState !=0){
      BaskState = 0;
    }
    page_counter=1;
    State = 0;
  } else if ( State == 'a') {
    // Turn on BASK
    page_counter=6;
    relay5_state=LOW;
    if(BaskState !=1){
      BaskState = 1;
    }
    page_counter=1;
    State = 0;
  }
  if (State == 'o') {
    // Turn off SKY
    myDFPlayer.stop();
    page_counter=7;
    relay6_state=HIGH;
    subpage2_counter =0;
    subpage_counter =0;
    SkyMenu();
    lcd.clear();
    page_counter=1;
    State = 0;
    clearSkyMode();
  } else if ( State == 'm') {
    // Turn SKY to MORNING
    myDFPlayer.stop();
    page_counter=7;
    relay6_state=LOW;
    subpage2_counter =1;
    subpage_counter =0;
    SkyMenu();
    lcd.clear();
    page_counter=1;
    State = 0;
    clearSkyMode();
  }else if ( State == 'd') {
    // Turn SKY to NOON
    myDFPlayer.stop();
    page_counter=7;
    relay6_state=LOW;
    subpage2_counter =2;
    subpage_counter =0;
    SkyMenu();
    lcd.clear();
    page_counter=1;
    State = 0;
    clearSkyMode();
  }else if ( State == 'e') {
    // Turn SKY to EVENING
    myDFPlayer.stop();
    page_counter=7;
    relay6_state=LOW;
    subpage2_counter =3;
    subpage_counter =0;
    SkyMenu();
    lcd.clear();
    page_counter=1;
    State = 0;
    clearSkyMode();
  }else if ( State == 'n') {
    // Turn SKY to NIGHT
    myDFPlayer.stop();
    page_counter=7;
    relay6_state=LOW;
    subpage2_counter =4;
    subpage_counter =0;
    SkyMenu();
    lcd.clear();
    page_counter=1;
    State = 0;
    clearSkyMode();
  }else if ( State == 's') {
    // Turn SKY to STORM
    myDFPlayer.stop();
    page_counter=7;
    relay6_state=LOW;
    subpage2_counter =5;
    subpage_counter =0;
    SkyMenu();
    lcd.clear();
    page_counter=1;
    State = 0;
    cloudySkyMode();
  }


}
- And lastly, we can add that void to the “loop” void so it runs automatically. Paste this code:
bluetooth();
- Once the code can be verified upload it and you should be able to pick up the paludarium from your mobile device now.
MIT App Inventor 2
Now that we have the first part of this guide completed, let’s take a look at the app development. I will break this down into three phases, so you understand my approach to this application.
Mobile App Functionality
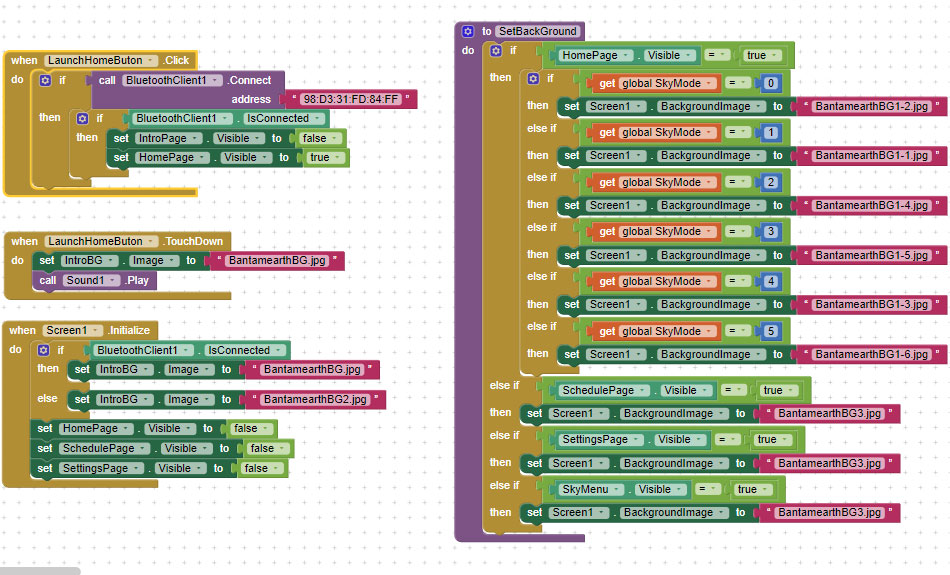

First, I focused solely on the functionality of the app. App Inventor 2 works in a way that allows you to build the app on-page at a time. Screens are how you would typically separate those pages. I decided to build my entire app on one screen lol. I hid parts of the screen giving the impression that you are navigating through pages. This allowed the app to run smoother, quicker, and made it more dependable.
My goal here is to make sure this app does everything I need it too:
- Easily connect to the paludarium via Bluetooth.
- Receive sensor readings 24/7.
- Send/receive commands at any point.
- Control the paludarium automatically when setting too.
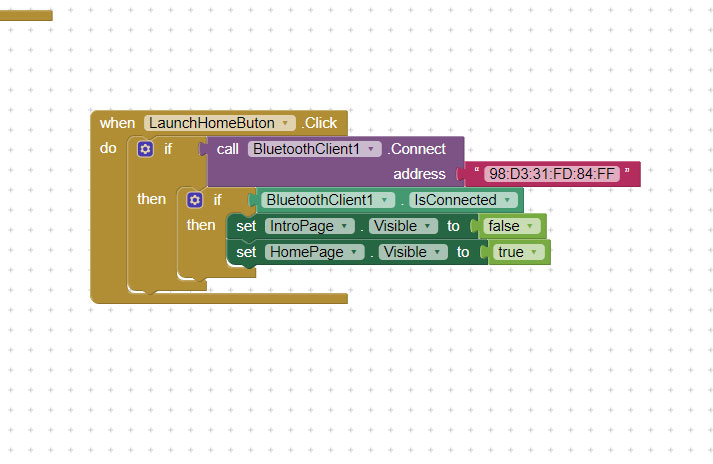

Starting with how I choose to have the app connect to the paludarium’s Bluetooth module. Instead of having available Bluetooth devices to choose from when the app first launches… I decided to just have the app look specifically for the tank by its exact address. I figured, I only have one device at the moment this app will need to connect to.. Why not save time & have a better user experience.
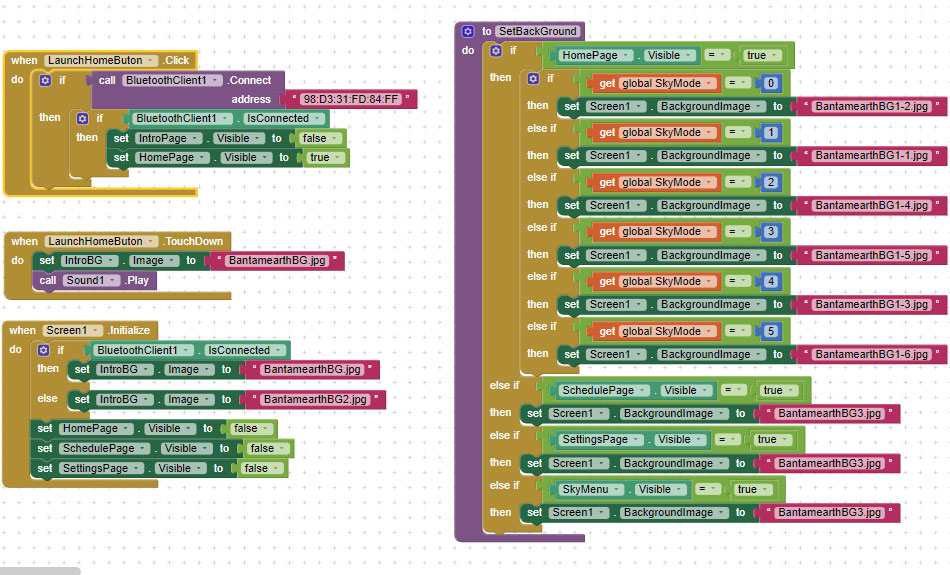

Receiving readings from the tanks temp and humidity sensor was the next task to tackle. Once a connection between the app and the paludarium is established, The app can receive serial transmissions from the tank. From those the transmissions, the app can read and update the info on the home page screen of the mobile device.
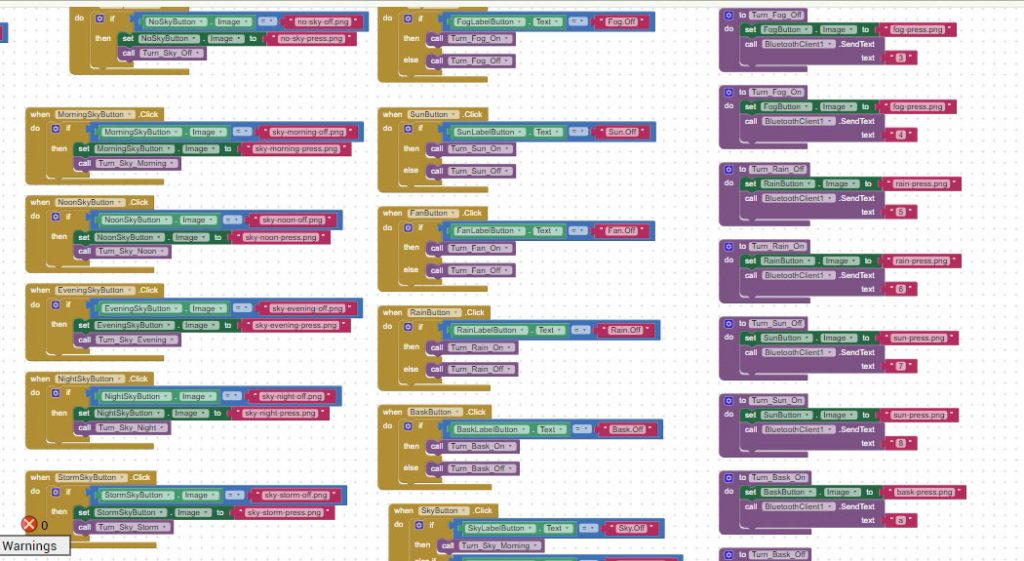

While receiving serial transmissions, the app can return serial transmissions back to the Bluetooth module on the tank. Depending on what the transmission read, the app could remotely control any option on the Arduino’s board.
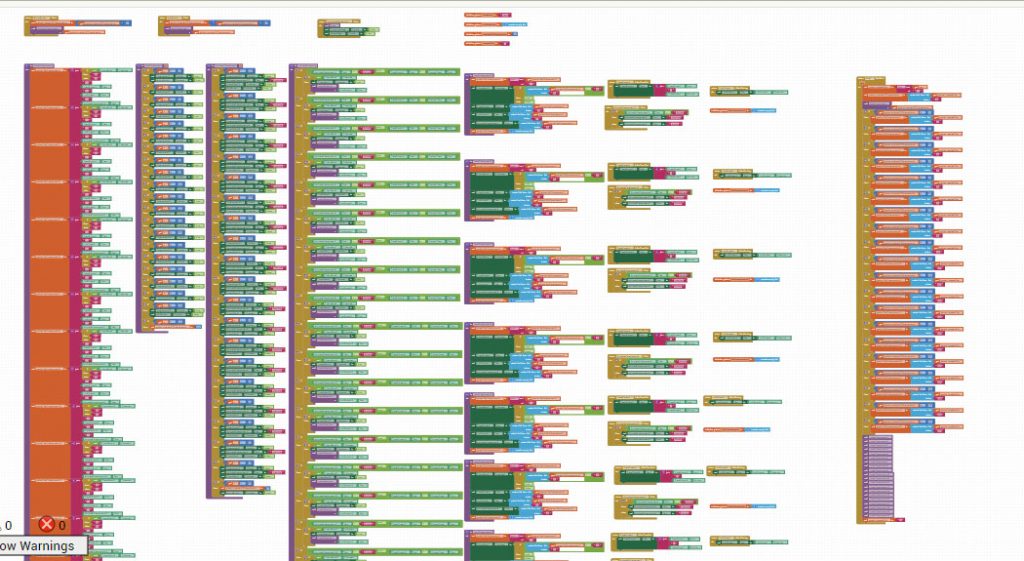

Now for the most challenging part, an automated schedule to work the tanks amenities throughout the day. I ran through a number of ideas as to how I could create such a function on App Inventor… In the end, I decided to go with the long, tedious, yet effective method that works to this day.
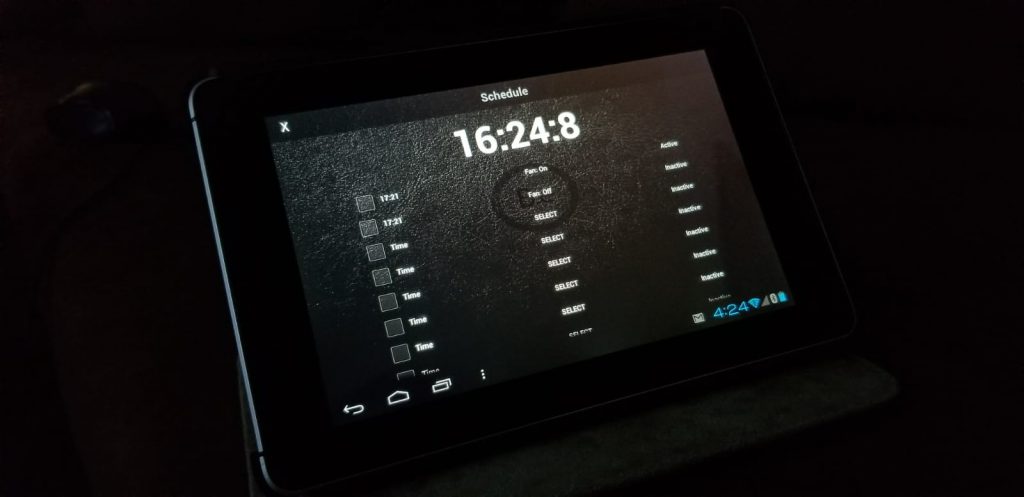

Yes… I have been called crazy before… OK, the idea is the user submits a number of options and then saves it… Depending on if rather or not the mobile device’s time matches the user’s requested option’s time… Then the app will send a serial transmission to the tank reflecting the user’s input.
Optimize User Interface
Once the app has proven to work effectively I can move on to the cosmetics phase. Now I can worry about making it look pretty. A modern, clean user interface was a priority here. As a graphic designer, this was a very addicting phase to focus on.
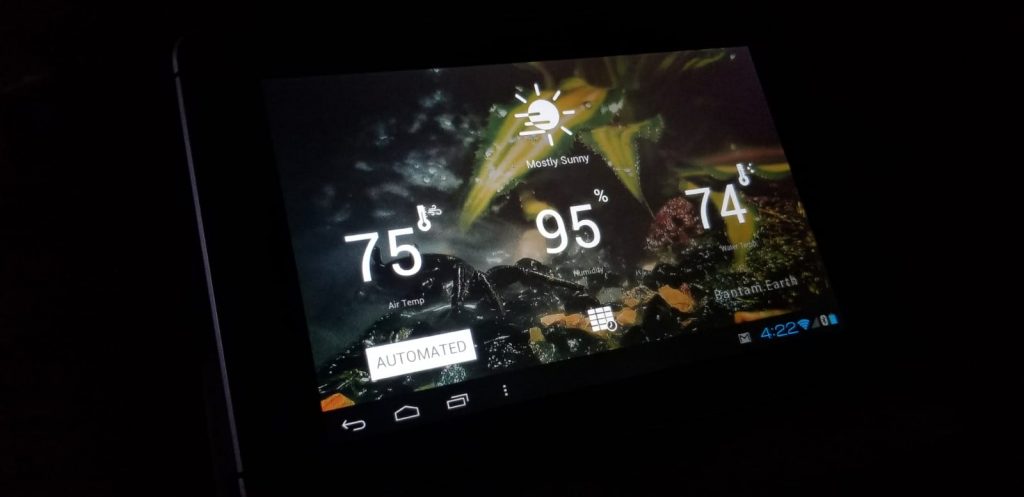

For my icons and buttons, I went with something similar to the iPhone weather station HUD. I liked the idea of there being mostly images to control setting instead of words. This made it more universal for everyone all ages to understand.
It’s pretty easy uploading images to App Inventor 2… I would caution you to make them as optimized as possible and use jpeg when you aren’t needing the translucency of a png image. I used only what I needed, my icons are png files and my background are all jpeg files.
Polishing User Experience
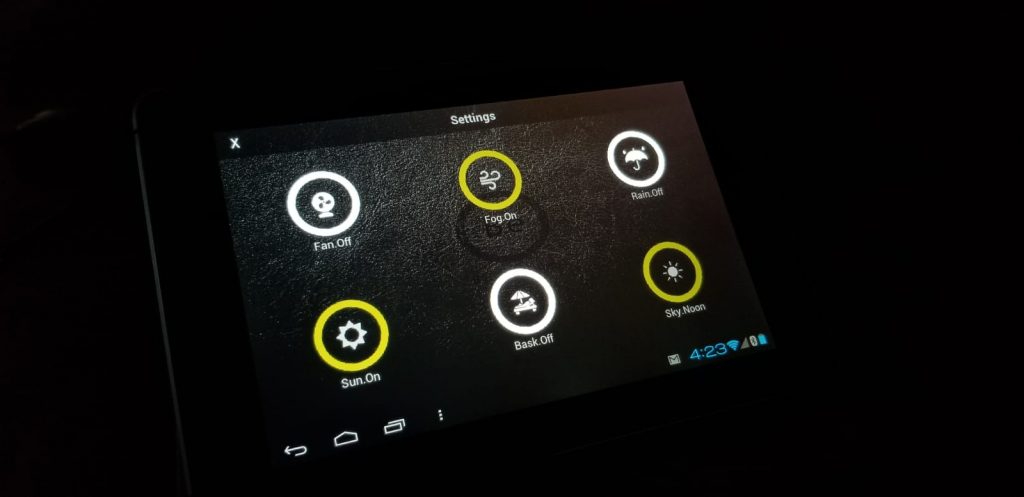

The final phase was polishing the overall user experience now that the icons and logos were uploaded. This is the opportunity to test out the app and tweak things to my preference. If I had any issues with receiving or transmitting serial data between the paludarium and the app, I would take this time to figure out what got crossed during the visual upgrade.
I set and adjust the paludarium’s schedule. Making sure things come on and go off at the right time. The schedule pretty closely follows the day here in Florida. The simulated sun rises at 7 am and sets at 7 pm… The rain comes on twice a day with the thunderstorm making its debut in the afternoon before revealing the night’s stars at 9 pm… Midnight resets the app’s log and repeats the schedule all over again the next day.
Conclusion
This was a very complicated process to explain, so I hope my overview was rational enough to understand my thoughts. You can always leave a comment with questions concerning anything you might want to know more about. Other than that, this concludes things for this chapter and we can finally start to scape the paludarium with plants in the next chapter!


Comments are closed.