For any serious aquarist, providing live food is the single best way to ensure the vibrant color and vigorous health of their fish and invertebrates.
Among all the options, freshly hatched brine shrimp are the undisputed gold standard… a perfect, nutrient-packed meal for picky eaters and growing fry.
The good news is you don’t need a laboratory to produce this superfood. This guide is your complete resource for mastering the art of the brine shrimp hatchery.
We’ll walk you through the classic, from-scratch DIY method using a soda bottle, and then introduce the modern, all-in-one Bantamarium V2 CULT kit for a cleaner, faster, and more efficient hatch.
Table Of Contents:
Toggle
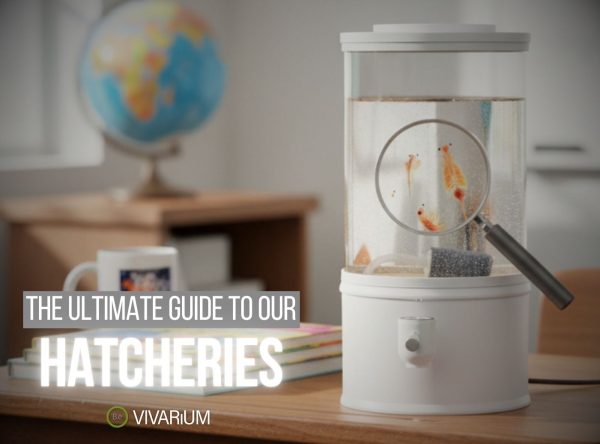
What Are Brine Shrimp?
Brine shrimp, known scientifically as Artemia, are tiny crustaceans that live in saltwater lakes and seas around the world.
They are not true shrimp but are often called “sea monkeys.”
In the aquarium hobby, they are famous for one incredible biological trick: their eggs, called cysts, can enter a state of suspended animation (cryptobiosis) and remain viable for years when kept dry.
When you purchase “brine shrimp eggs,” you are actually buying these dormant cysts.
By simply adding them to saltwater and providing aeration, you can trigger them to hatch into their larval stage, called nauplii.
These freshly hatched nauplii are the prize.
They are packed with nutritious proteins and fats, and their tiny size makes them the perfect, irresistible live food for a huge variety of freshwater and saltwater fish fry, shrimp, and other small aquatic inhabitants.
The Classic DIY Brine Shrimp Hatchery
For decades, the humble plastic soda bottle has been the go-to tool for hobbyists hatching their own brine shrimp.
This classic DIY method is effective, inexpensive, and a fantastic project that gives you a deeper understanding of the hatching process.
With a few simple items, you can create a reliable hatchery in under an hour.
Materials Needed:
- Brine Shrimp Culture – The better the source, the higher the hatching percentage.
- 2 Containers -You can get pretty creative with this part. Most people do this with water bottles, but I wanted something cleaner and professional-looking.
- 1 Roll of Air Line Tubing – This will have 2 purposes: One to run air from the air pump into each container. The other reason will be to make a short pour line for easily getting our Shrimp out when we are ready for them.
- 1 Small Air Pump – It’s really important to keep aeration within our Hatchery at all times except when we are trying to pull some out.
- 1 Baking Soda – This will help buffer our hatchery’s pH. We need it to be at least 8.0 or Higher to help get a higher hatch rate.
- 1 Non-Iodized Salt – We need the salinity to mimic that of the more natural habitat these little guys come from. I found that aquarium salt works best for me.
- 1 two-way control valve – For splitting the air from the pump and having independent control over the amount of air each container receives.
- 2 single-control valves – For a nice, clean switch at the pour out of the containers.
- 1 Lighting – Depending on where the Brine Shrimp Hatchery will be located, you will need to figure out if rather you will use LEDs, heat lamps, or a regular light bulb.
Step-by-Step Instructions:
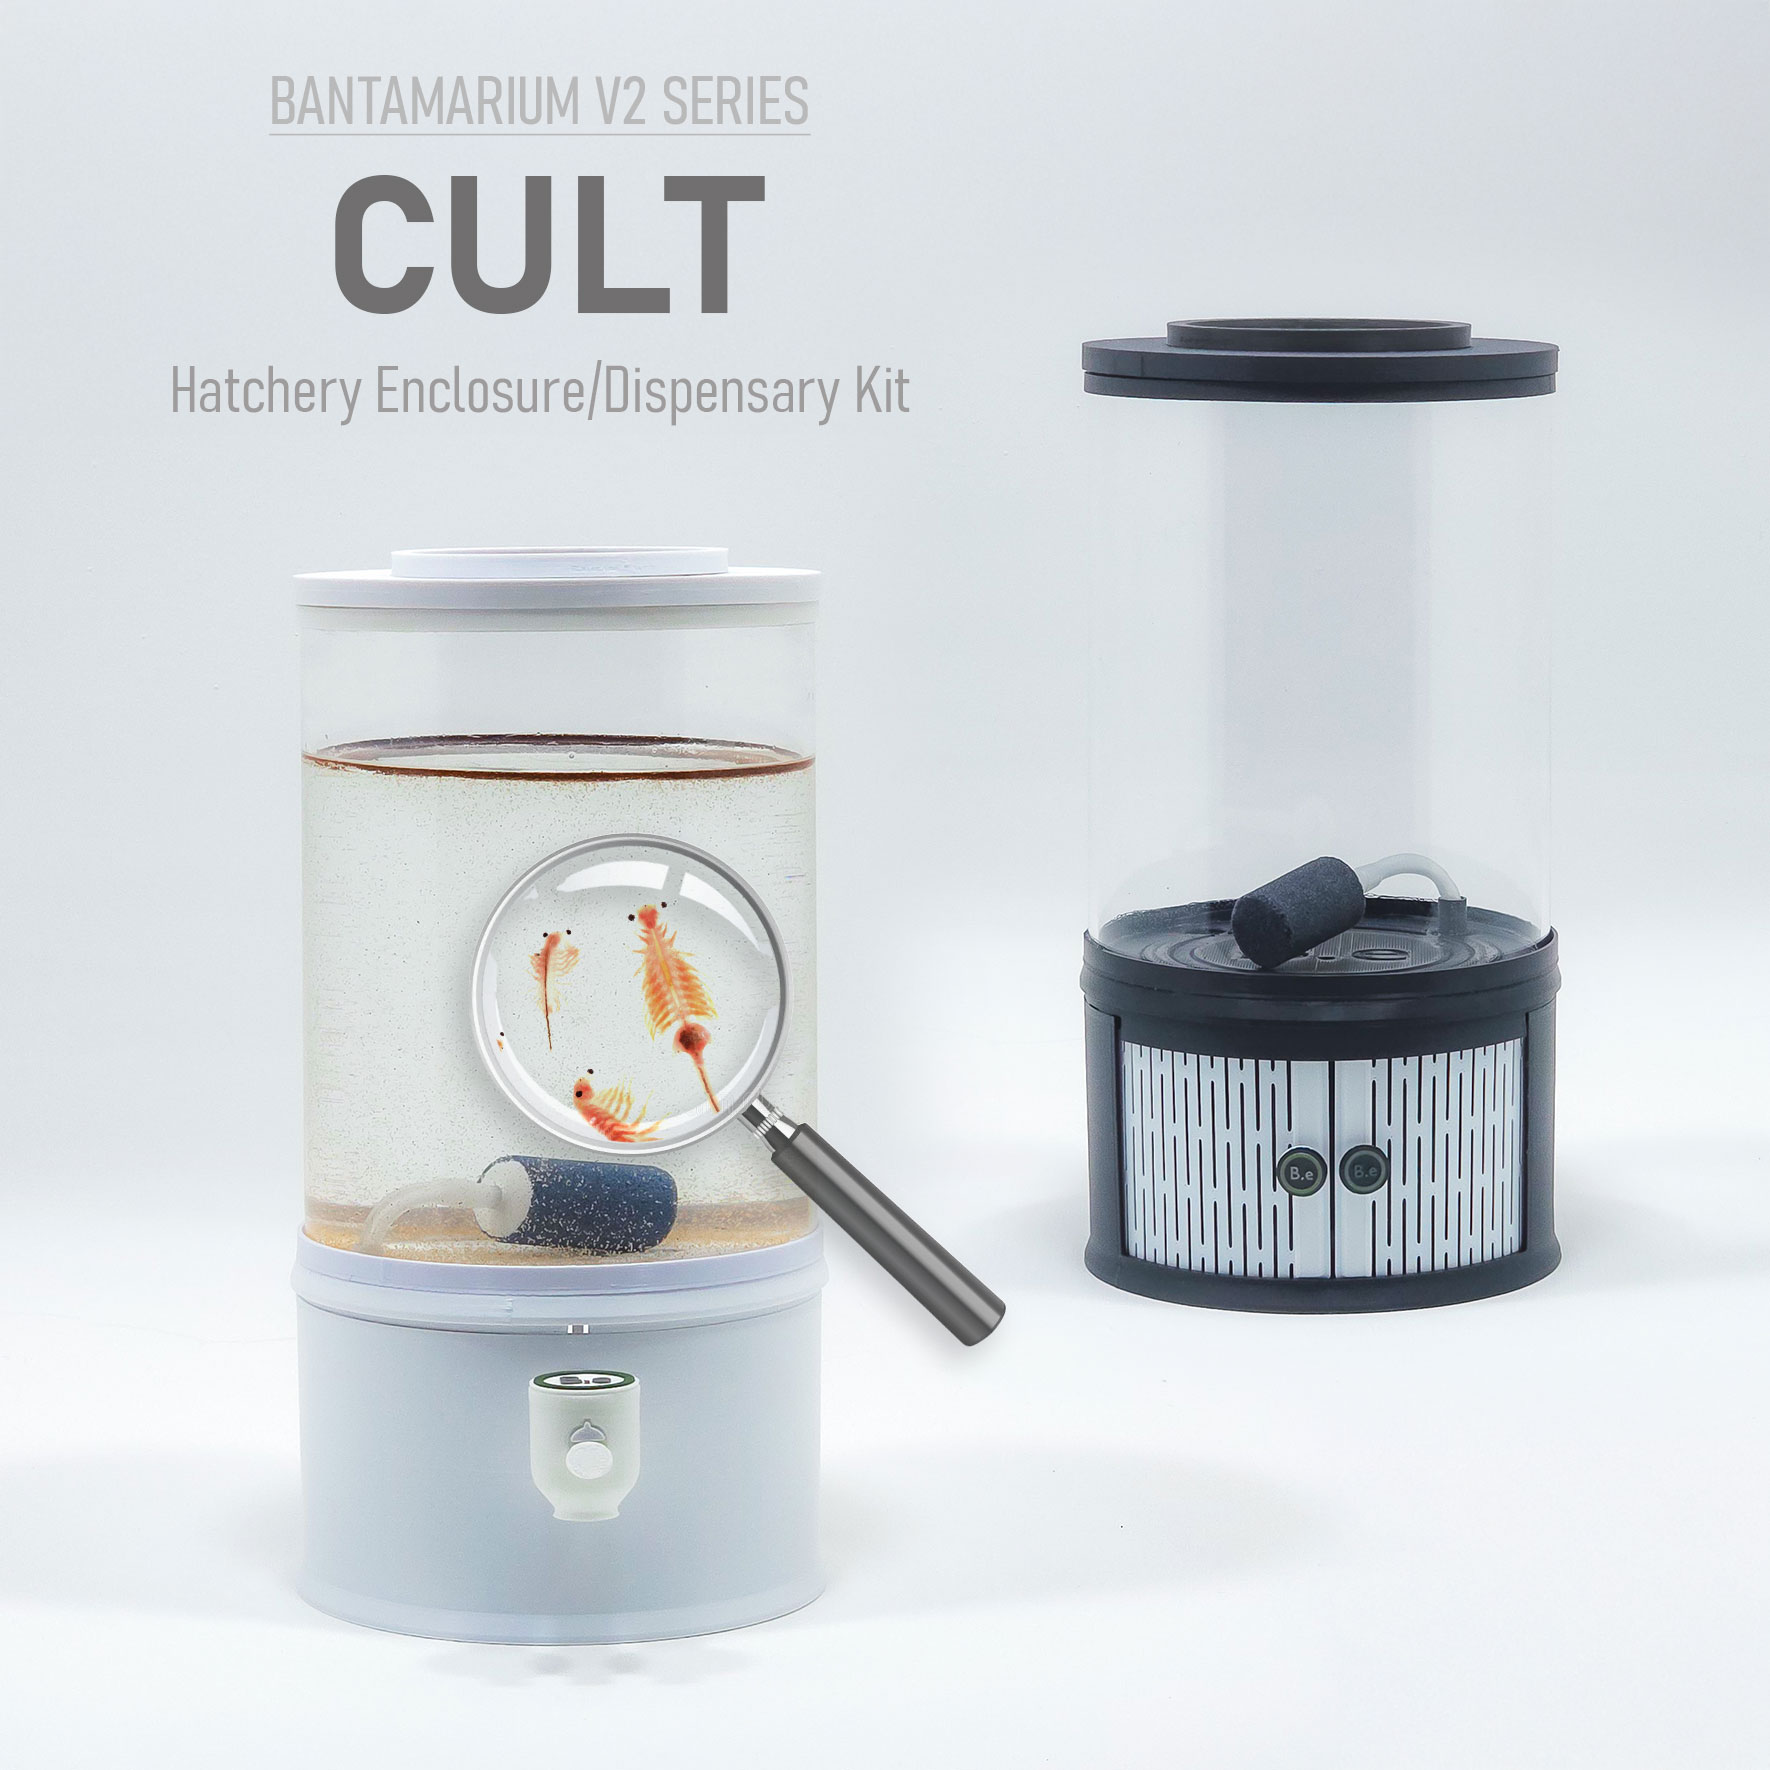
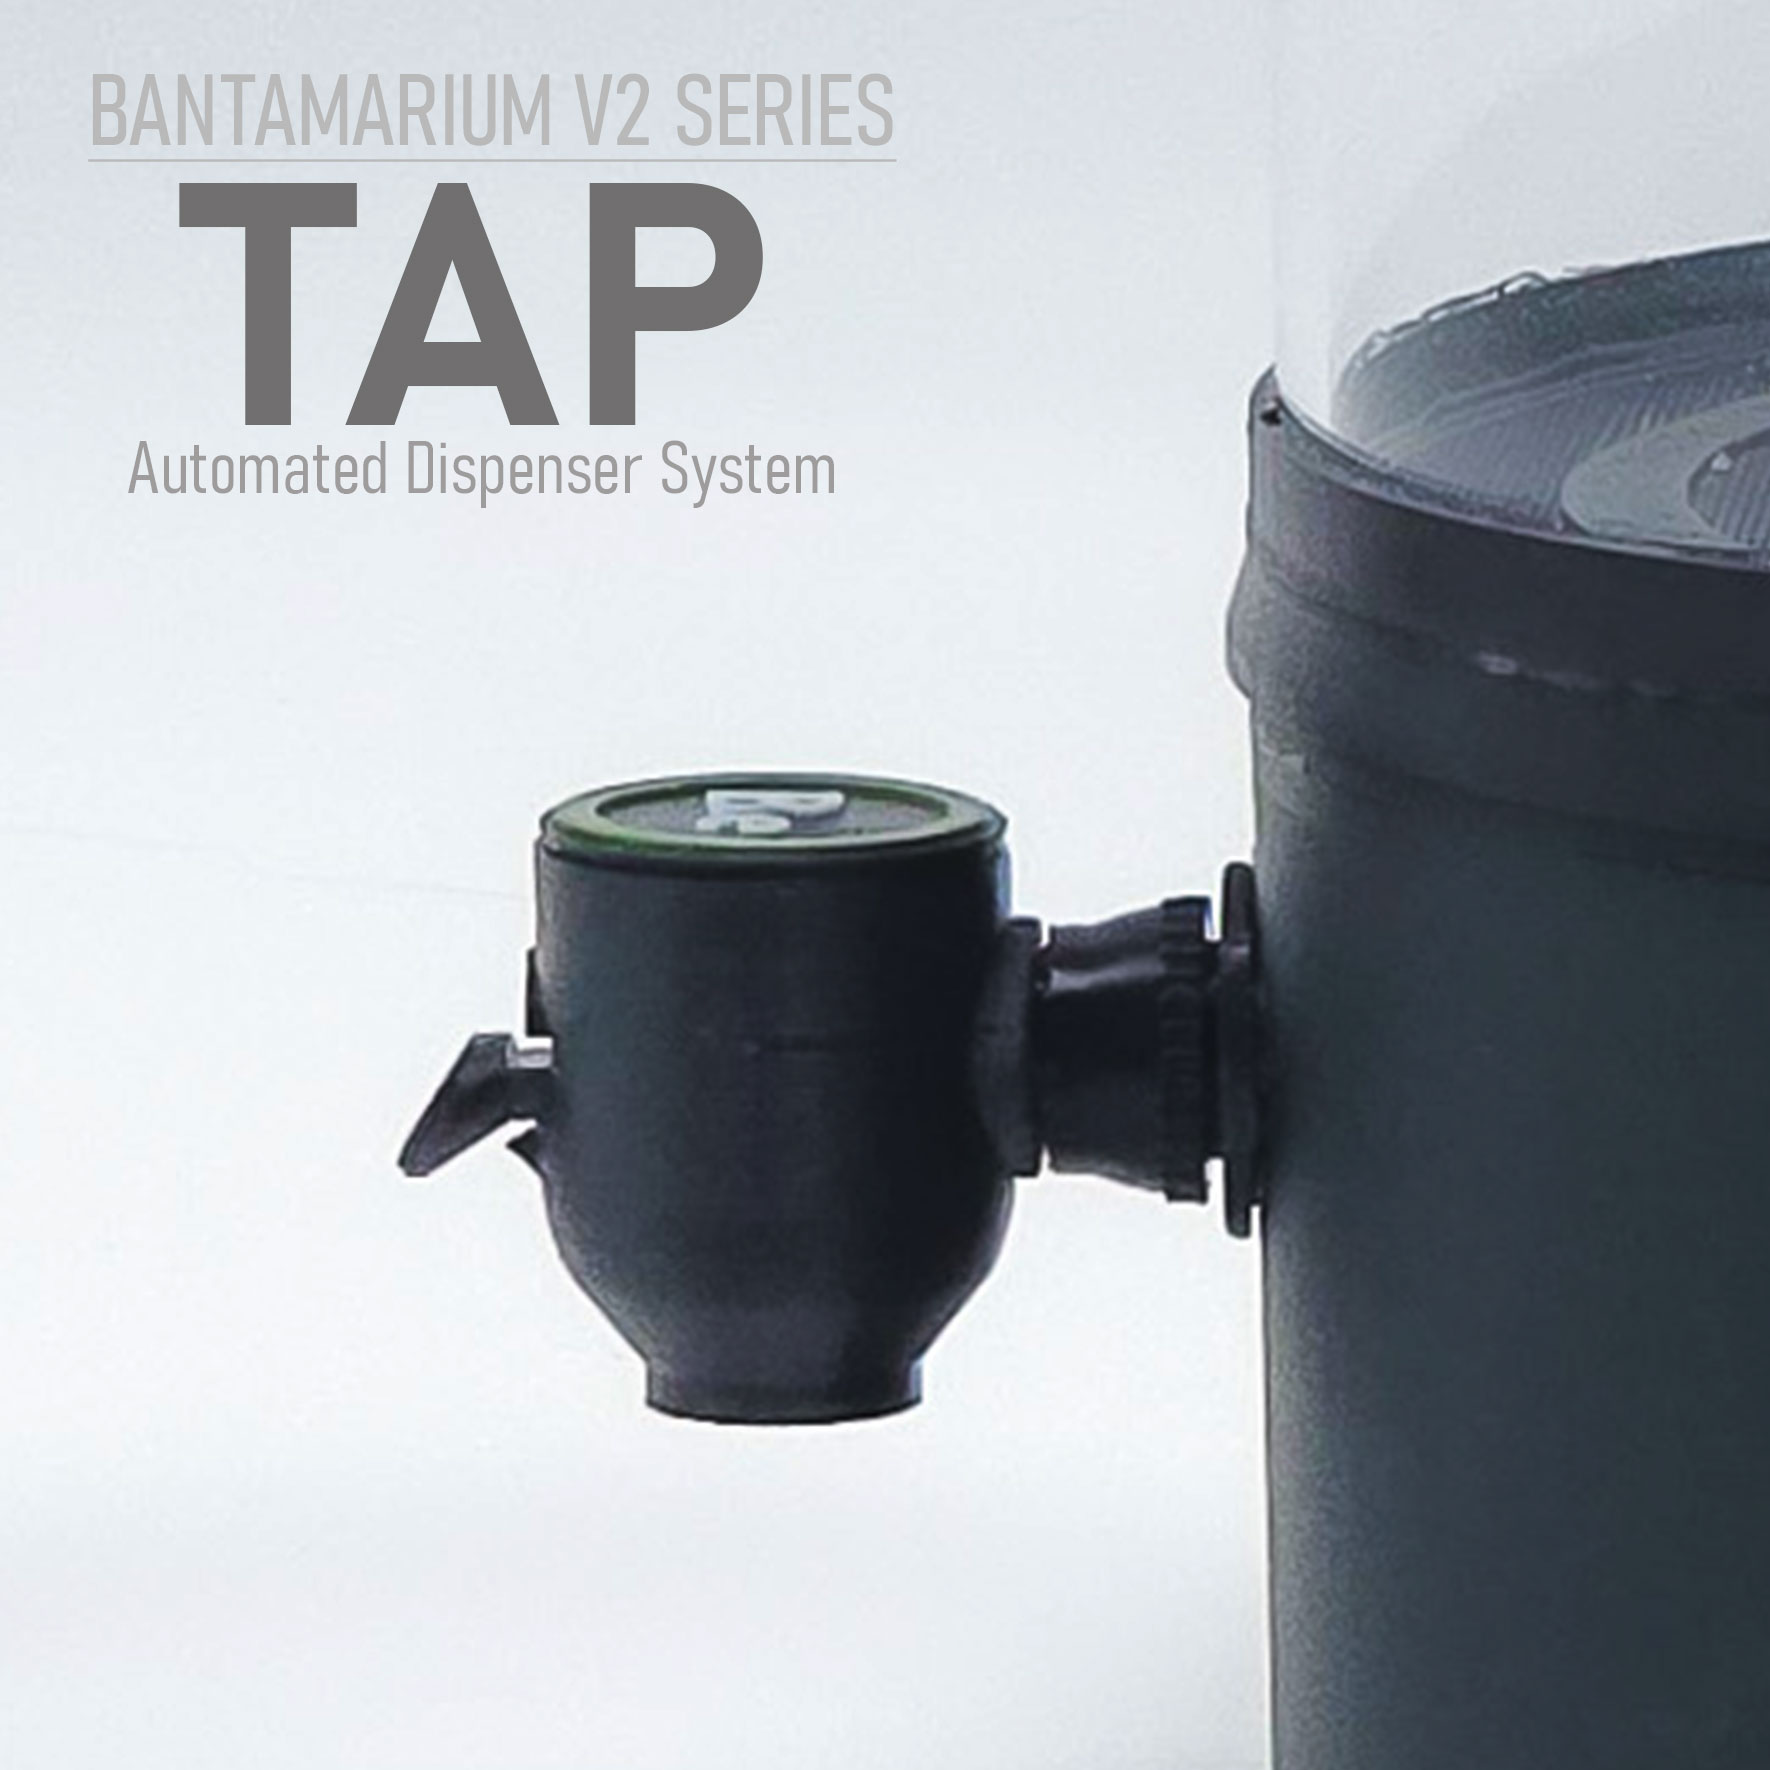
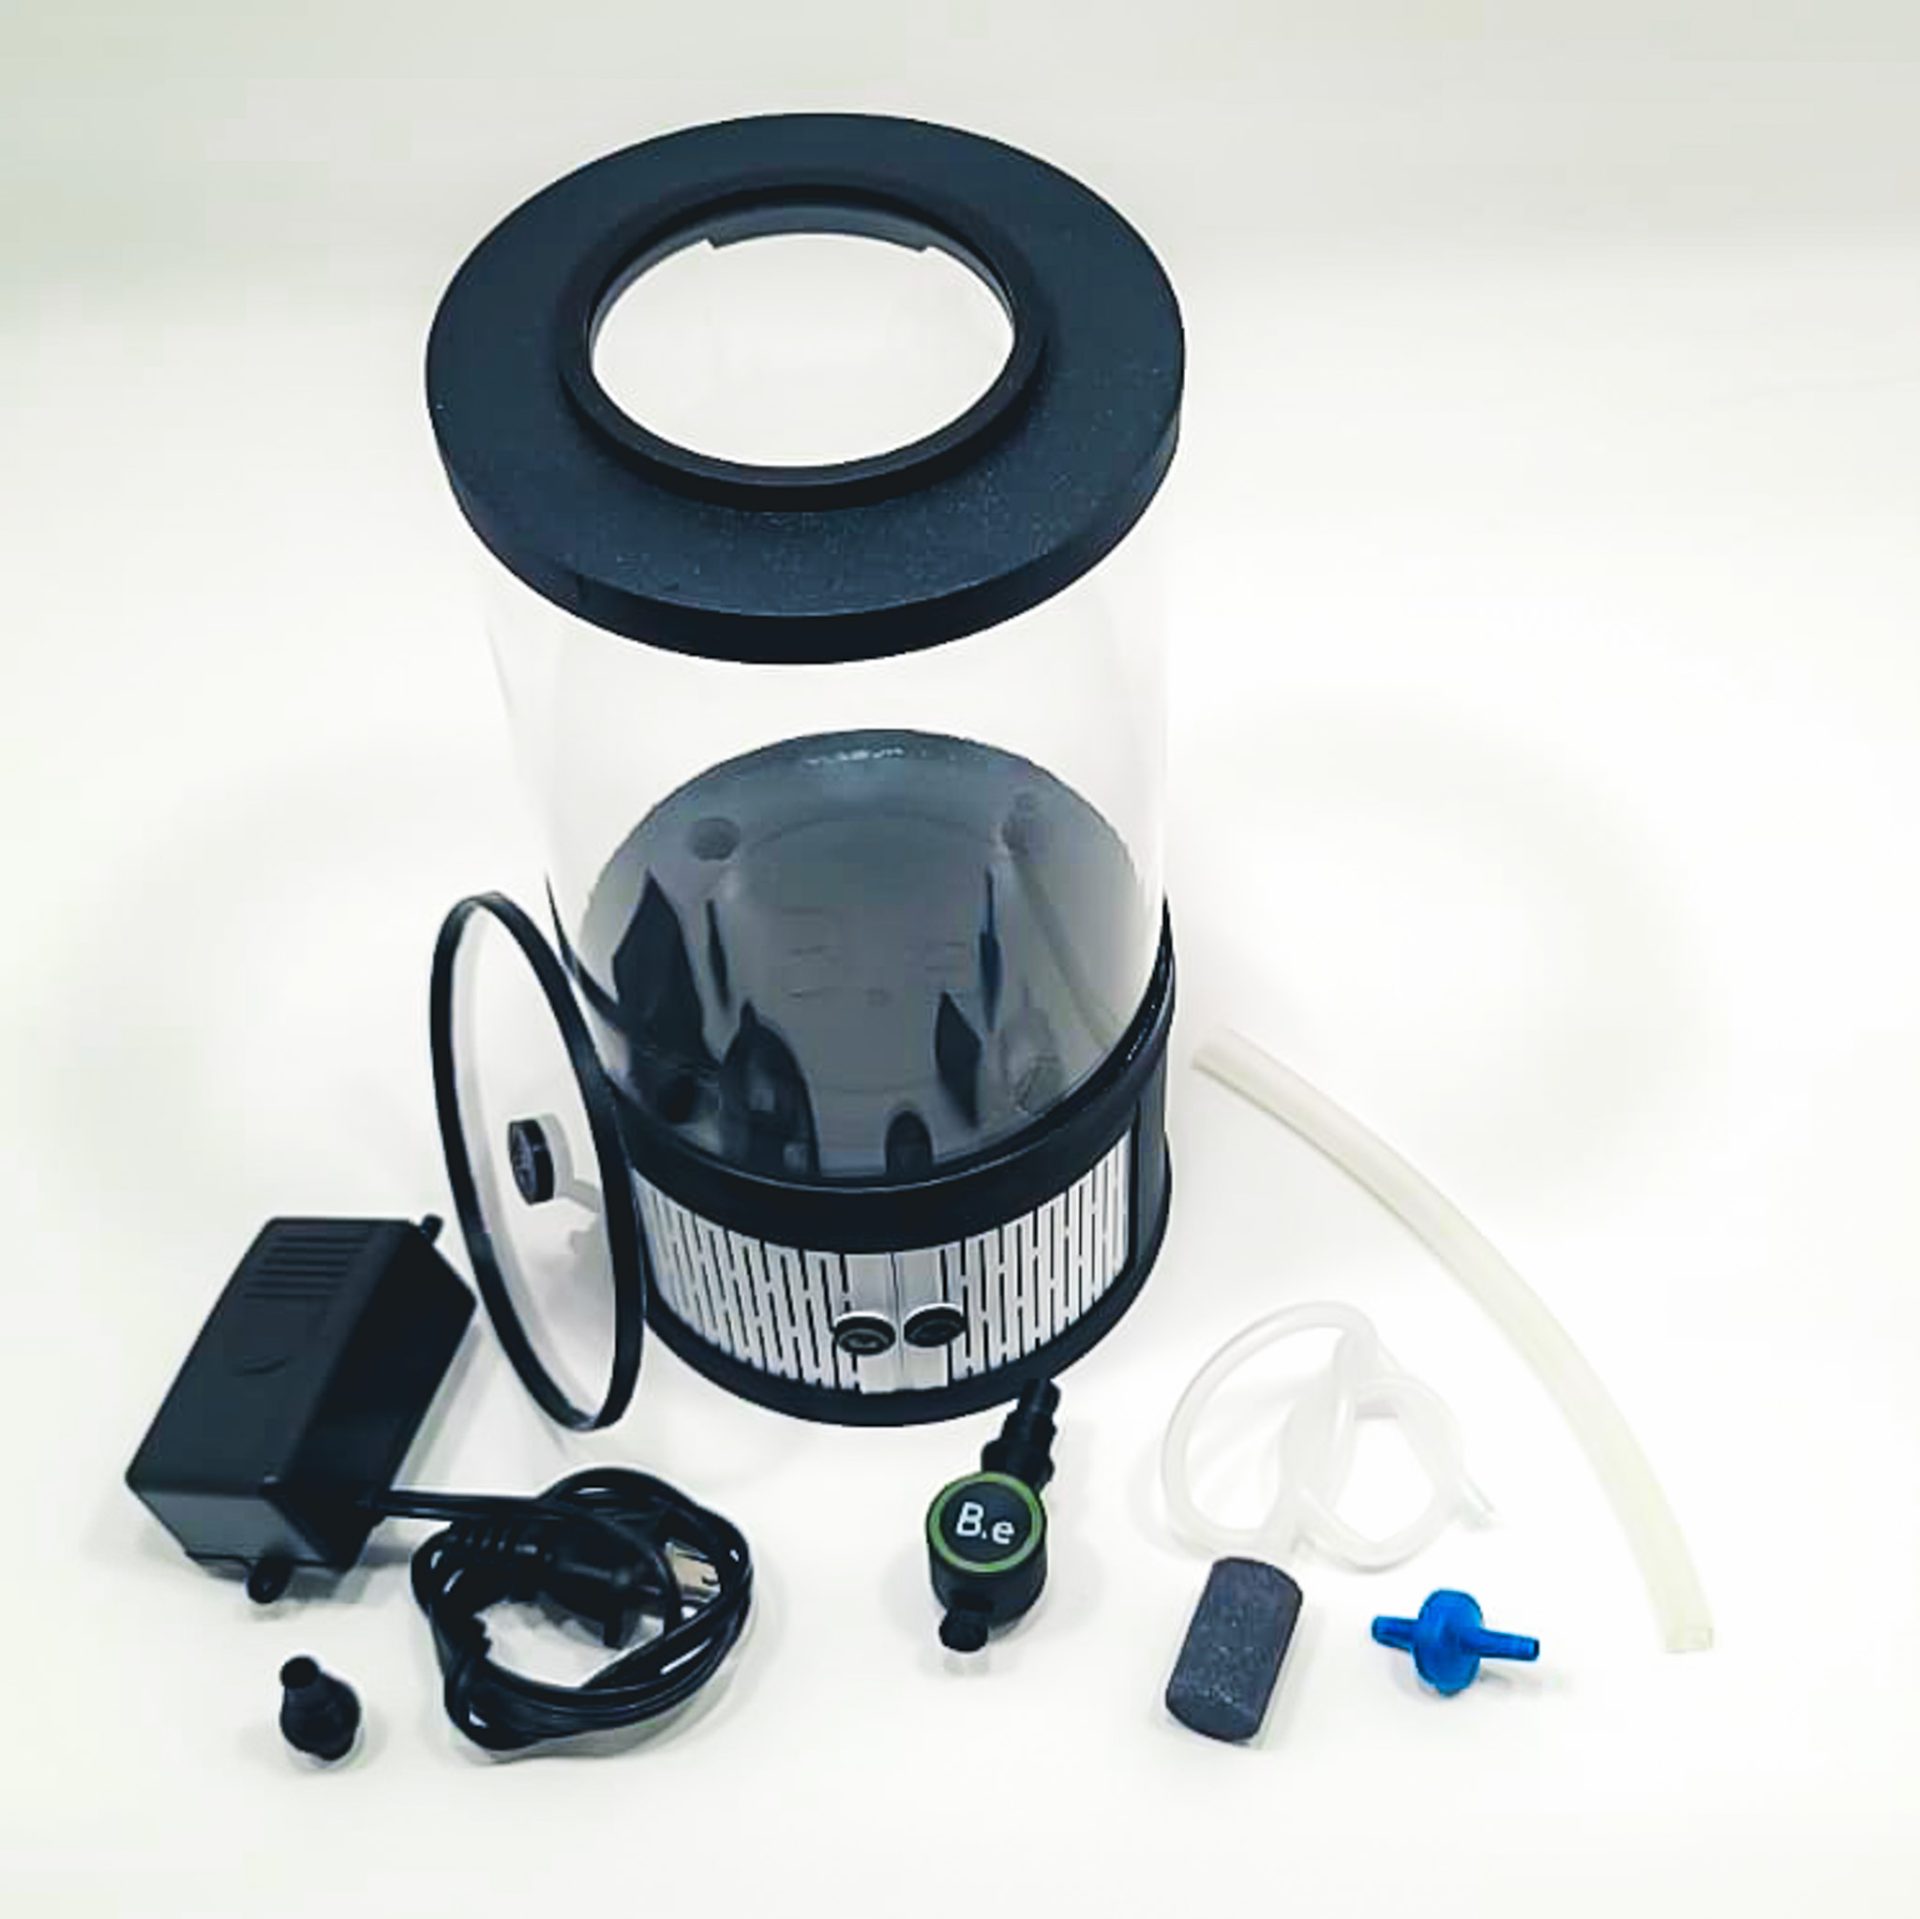
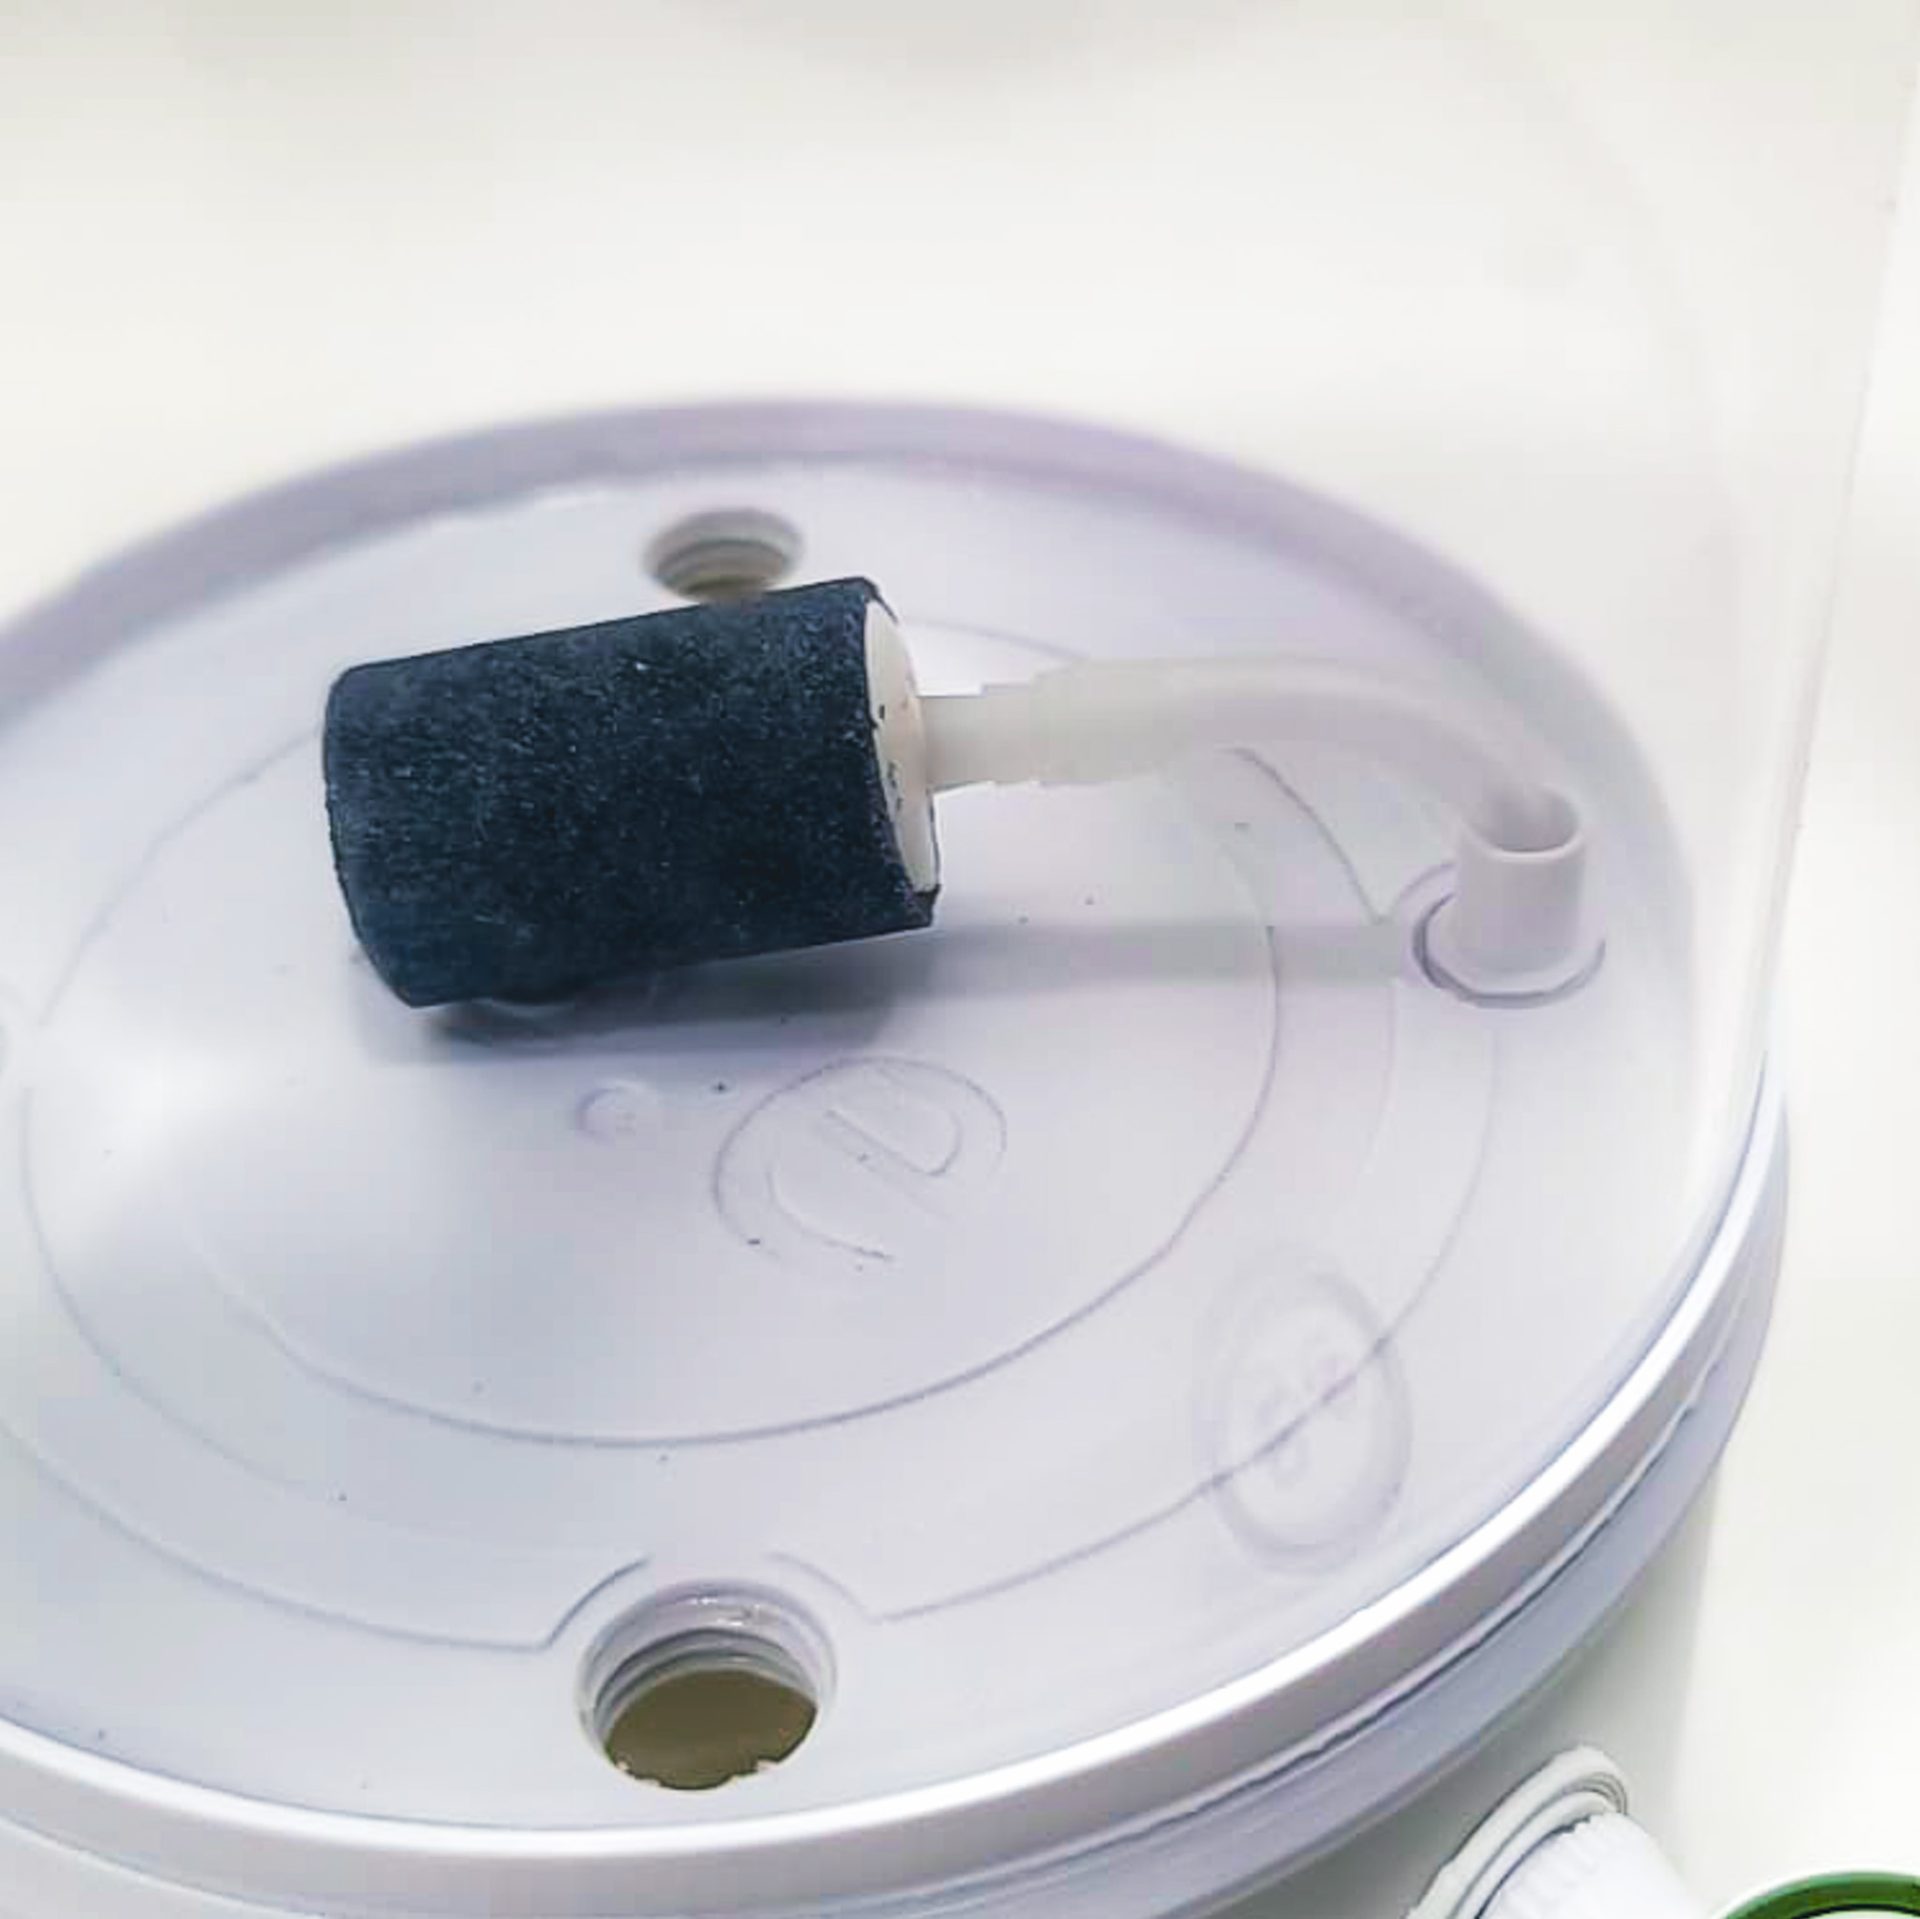
- Let’s start with the container… I drilled four holes at the top for ventilation, just to realize later it wasn’t really needed, haha! One at the top will due for the air pump tube and one in the edge of the front/bottom for the pour out tube. Make sure it is slightly smaller than the tube for a snug fit.
- Next, I cut about half an inch off the tube for the pour out and plugged it with a plastic stopper I had leftover from another project. An air control valve can also go here if you have them already (mine weren’t in at the time of this install). You can alternatively get away with pinching the tube with clamps if you cut it about an inch instead.
- After that, we can run the air pump tube into the two-way control valve and out to the top of each container from the control valve. I would recommend placing a one-way check valve between the air pump and the two-way valve control. It will keep water from returning back to the air pump when the pump is off.
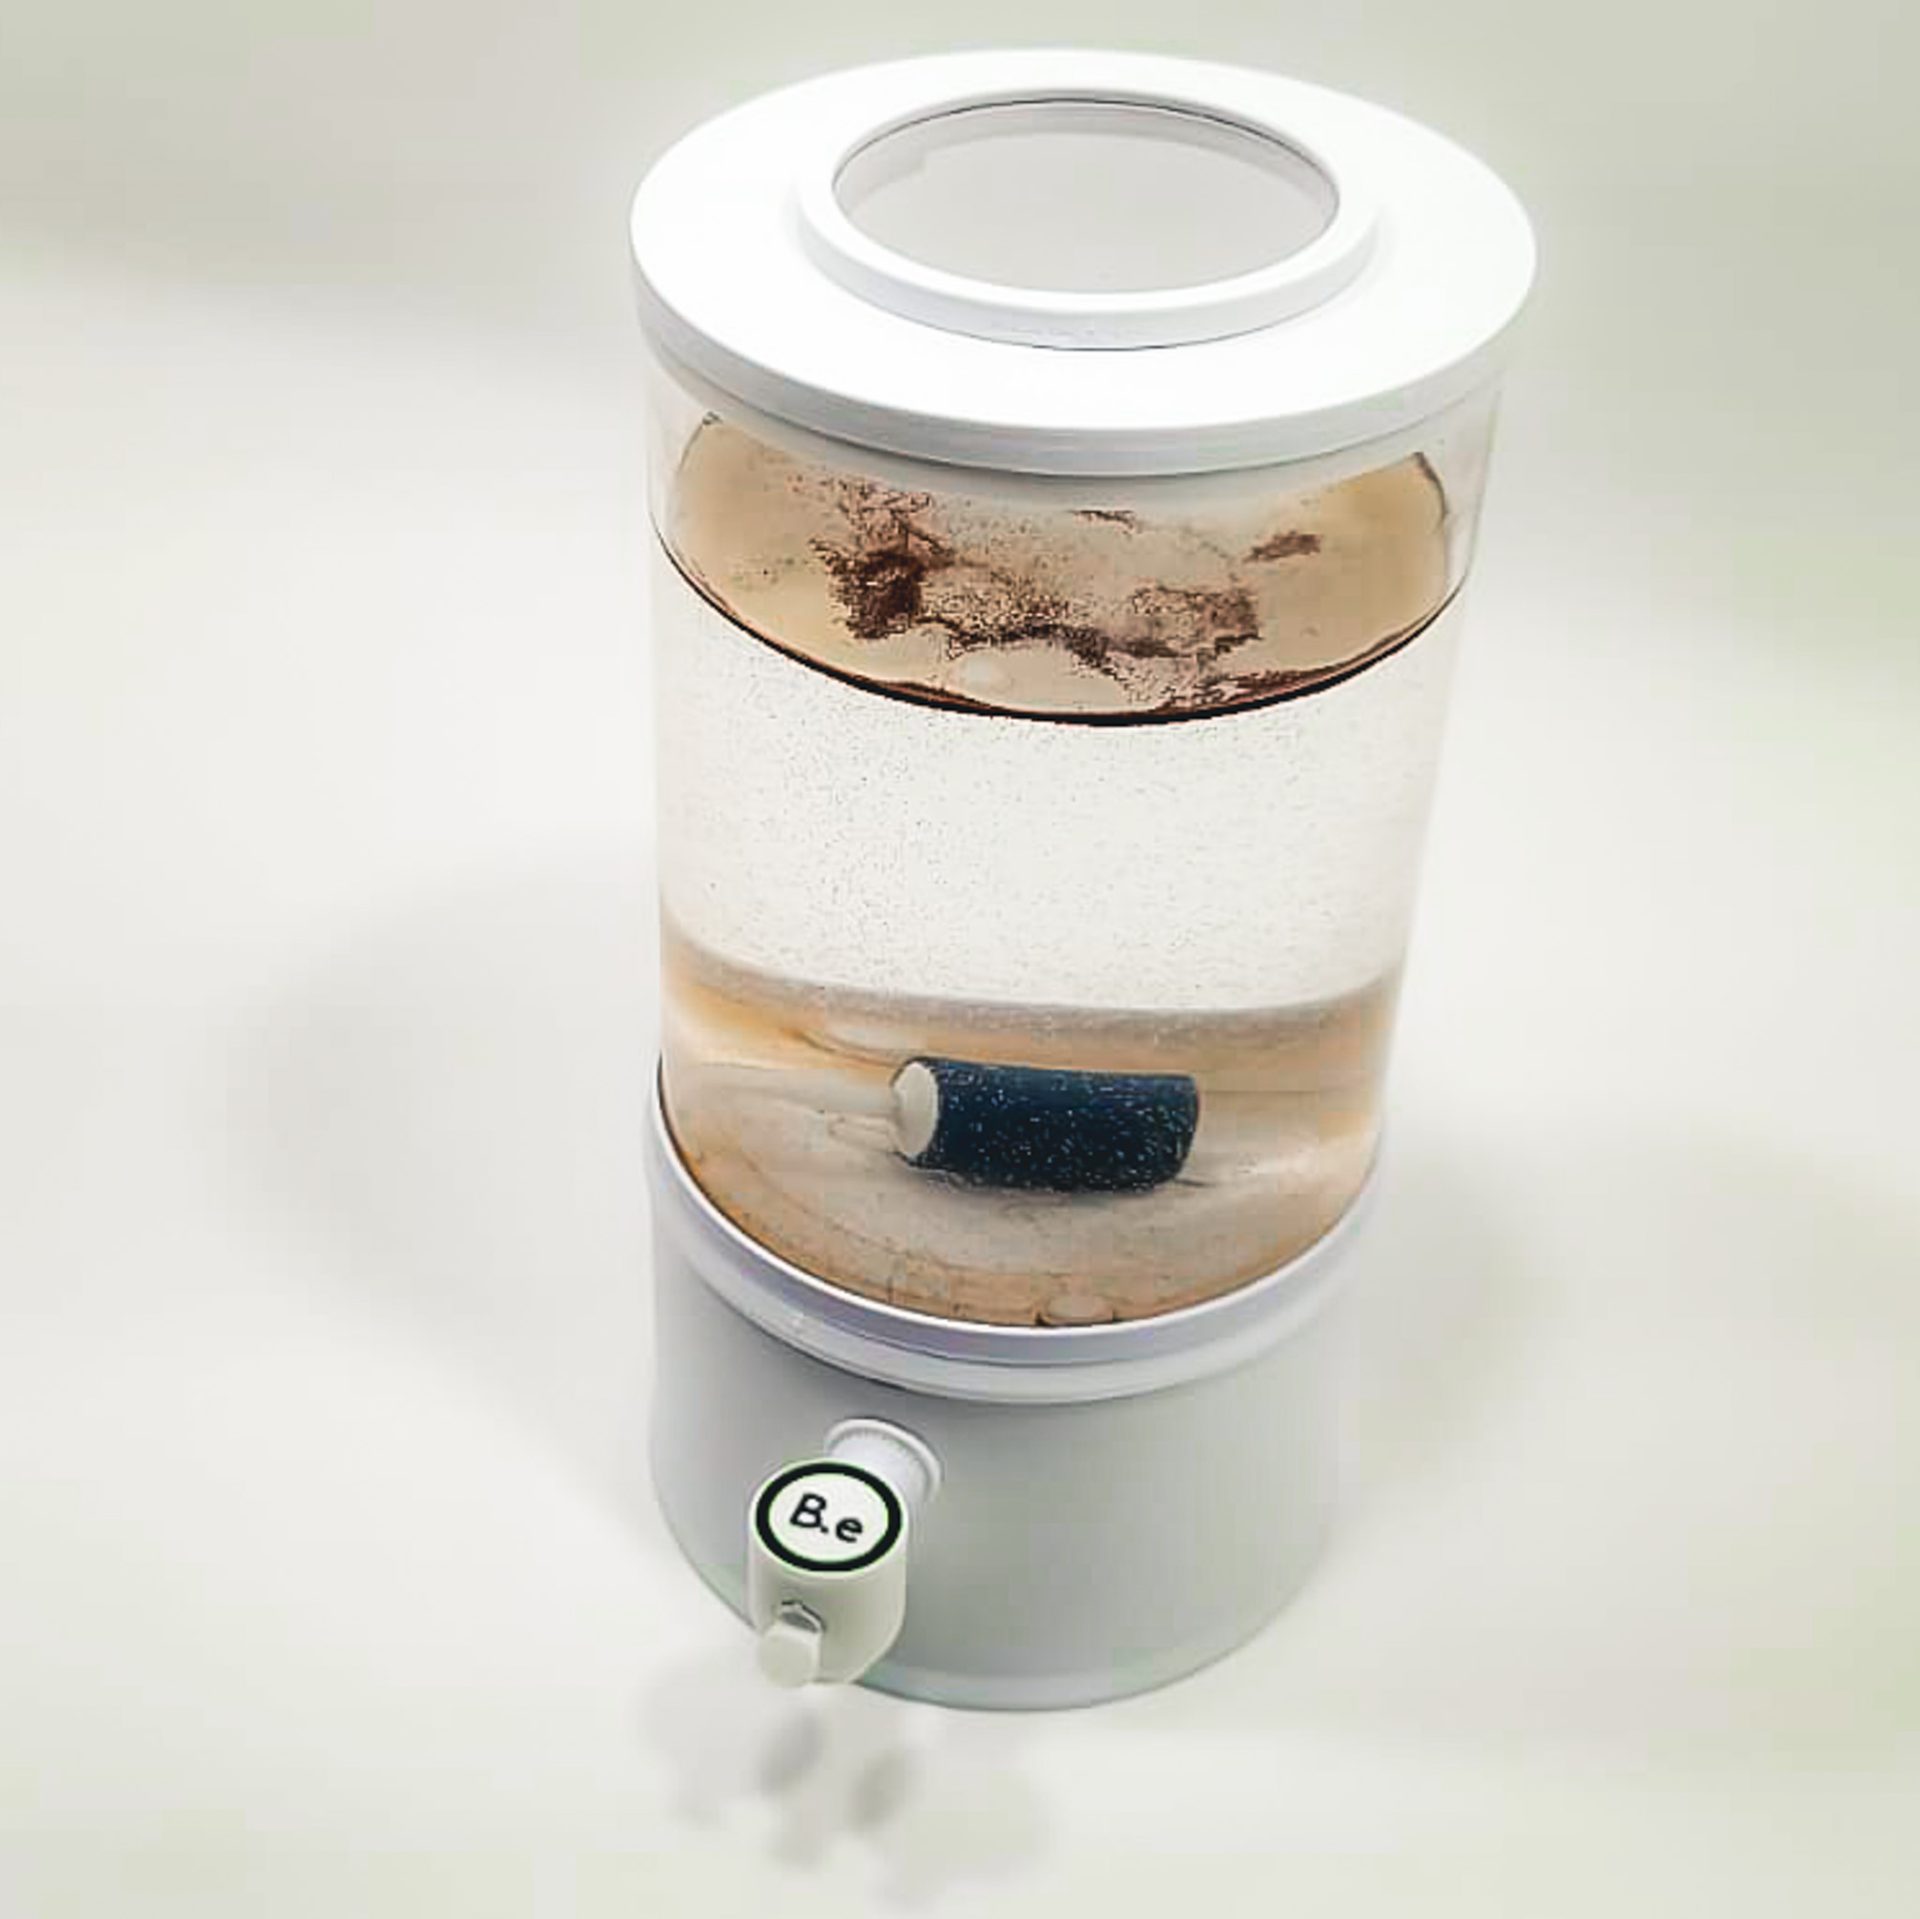
- Our Brine Shrimp Hatchery is pretty much complete. Now, let’s use a separate container to set up our water parameters (I’ve found this makes it easy to evenly measure out the containers with equal water specs). My containers hold about half a liter of water each so I measure out one whole liter of distilled water, or treated tap water, in my new container and add 1.5 teaspoons of the non-iodized salt and half of a teaspoon of baking soda into the mix until it dissolves.
- Once both hatcheries are filled with water, we can now add half a teaspoon of Brine Shrimp eggs to one of the containers. The second container will act as a reserve for starting a new batch once the first container is halfway gone.
- You can now cycle back and forth between hatcheries, and you will always have brine ready on tap!
A Better Way to Hatch: The Bantamarium CULT Kit
The DIY soda bottle method is a classic for a reason, but it comes with its own set of challenges… it can be unstable, messy to harvest from, and isn’t built to last.
For the serious hobbyist who wants a cleaner, more reliable, and permanent solution, we created the Bantamarium V2 CULT Kit.
This is a purpose-built, all-in-one system designed to make hatching brine shrimp as simple and efficient as possible.
The All-in-One System
The CULT kit is built on our versatile V2 platform. It uses a V2 VAPO Core glassware piece, which provides a crystal-clear and durable hatching vessel.
This sits securely in a V2 DOCK Pocket 2, which creates an incredibly stable, tip-proof foundation that looks great next to any aquarium.
The kit also includes a quiet and reliable air pump and all the necessary tubing, so you have every piece of hardware you need right out of the box.
The Game-Changer: The Bantamarium TAP Dispenser
The single biggest hassle of a DIY hatchery is harvesting the shrimp. It often involves messy siphons and separating the live shrimp from the empty egg shells.
The CULT kit solves this with the innovative Bantamarium TAP. This simple, twist-valve dispenser is integrated directly into the system.
When your shrimp have hatched, you simply turn off the air, let the empty shells float to the top, and then open the tap at the bottom to dispense a clean, concentrated stream of live, nutritious brine shrimp directly into your collection cup.
It’s a clean, fast, and incredibly efficient harvesting method.
Ready to upgrade your hatching game?
Setting Up Your Bantamarium CULT Hatchery: Step-by-Step
One of the greatest advantages of the Bantamarium CULT kit is its incredibly simple, tool-free setup.
You can go from unboxing to a fully operational hatchery in under five minutes.


Step 1: Assemble the Hatchery
Start by taking the Bantamarium TAP dispenser and twisting it securely into one of the lower portal ports on the V2 DOCK.
Then, take the VAPO Core Glassware and twist-lock it onto the top of the Tall Base. Your main hatchery vessel is now fully assembled and stable.
Step 2: Connect the Air Pump
Connect the included airline tubing to your air pump.
Run the other end of the tubing up through the top opening of the VAPO Core and push the end all the way down until it touches the bottom.
There is no need for an air stone; the open airline will create the large, rolling bubbles needed to keep the cysts in motion.


Step 3: Add Water, Salt, and Eggs
Fill the Bantamarium about two-thirds full with dechlorinated water. Add aquarium salt or non-iodized table salt at a ratio of about 1-2 tablespoons per liter.
Finally, add your brine shrimp cysts (typically ¼ to ½ teaspoon is plenty for a hatch).
Step 4: Start the Hatch
Place the splash guard on top of the water and close the top of the tank.
Ensure the valve on the Bantamarium TAP is closed. Plug in your air pump to begin aeration.
You should see a vigorous, rolling circulation of water, salt, and eggs inside the hatchery.
Place the unit in a warm, well-lit area to encourage a fast and successful hatch.
Within 24-48 hours, the water will be filled with a cloud of freshly hatched, nutritious brine shrimp.


Harvesting & Care: Getting Your Live Food
Once your Bantamarium CULT is teeming with a cloud of orange, freshly hatched brine shrimp, it’s time to harvest your nutritious live food.
This is where the thoughtful design of the CULT kit makes the process incredibly simple and mess-free.
Harvesting with the Bantamarium TAP
-
Stop the Bubbles: Unplug your air pump. The aeration will stop, and the water will begin to settle.
-
Wait and Separate: Wait for 5-10 minutes. The empty, unhatched egg shells (cysts) will float to the surface, while the live, orange nauplii will be attracted to light and will congregate in the clear water column, often sinking toward the bottom.
-
Dispense and Collect: Hold a fine mesh brine shrimp net or a small collection cup under the nozzle of the Bantamarium TAP. Gently pull the valve up and forward. A clean, concentrated stream of live brine shrimp will flow out, leaving the empty shells behind at the top. Close the tap by pressing it back and slightly down once you’ve collected enough.
Cleaning for the Next Batch
After you’ve harvested what you need, you can either restart the hatchery with a new batch or clean it for storage.
To clean, simply open the tap and drain the remaining water and shells. Then, disassemble the unit and rinse all components… the VAPO Core, V2 DOCK, and TAP… with warm water.
It will be clean and ready for your next hatch in just a couple of minutes.
Frequently Asked Questions
So now that we are all set up, let’s give it a go! Turn the pump on and let nature take its course… But now what? Here are some common questions that usually spring up after getting things up and going:
Do you need a light to hatch brine shrimp eggs?
Lighting and heat will be very important factors in helping the eggs to hatch. The temperature of the hatchery should stay between 80 and 90 degrees Fahrenheit. Since I live in Florida, I take advantage of the weather and keep my hatchery in a shed where there won’t be a need for a heat lamp.


I set up a cool LED lighting stand for my Hatchery. The LEDs are a lot safer to use and can be kept on for pretty much 24 hours a day. Another advantage of having LEDs is the ability to place them directly under the hatchery, making it easy to attract Artemia towards the bottom, where we will be draining the hatchery.
How long does it take for a brine shrimp egg to hatch?
Depending on the quality of the purchased Brine Shrimp Eggs, we should see babies within 18 to 48 hours. Anything longer than 36 hours and something’s wrong! Adjust the lighting and heat to make sure it’s bright and hot enough. If still, nothing has happened after 4 days, you might have a stale batch of eggs that weren’t refrigerated correctly between uses.
Turn off the pump and wait about 15 minutes for the hatched eggs to float and the babies to be really visible. Brine Shrimp are drawn to light, so taking a flashlight to the side of the hatchery should reveal newborn Brine Shrimp swimming towards it.
If you installed LEDs at the bottom as I did, you will see swarms of Brine Shrimp right at the pour-out valve, ready for abstraction!


What Do You Feed Brine Shrimp?
The first week or so into hatching eggs, you don’t have to worry about feeding the Brine Shrimp. They pretty much eat the eggs they hatch from. After about a week, you can move them into a cleaner container and begin feeding them there. I have found that giving them small bits of yeast or boiled egg yolk dissolved in water works best.
Make sure not to give them more than they will eat in a few minutes. The uneaten food left in the tank fouls the water fast… Which in turn will prompt more frequent water changes! You should be changing 30% of the water twice a week.
How Long Do Brine Shrimp Live For?
Depending on the water parameters of an aquarium, the Brine Shrimp life cycle can last up to eight weeks. Once hatched, the tiny critters can reach adulthood as soon as 8 to 10 days. In thriving conditions, the females will give birth to live babies (known as naupiii) or semi-developed embryos. In poorer conditions, the female will lay eggs (or cysts). Those unhatched cysts will wait for better water quality before hatching!


Can Brine Shrimp Live In Freshwater?
In Short, yes, but not for a long time. They don’t suffer an immediate shock like most saltwater fish would if you dropped them into a freshwater enclosure. The spared shrimp that aren’t picked off right away will eventually die.
The Best Food for Your Fish
Whether you choose the classic satisfaction of the DIY method or the modern efficiency of the Bantamarium CULT kit, hatching your own brine shrimp is one of the most rewarding things you can do for your aquatic pets.
You’re providing the highest quality, most nutritious live food possible, encouraging natural feeding responses and vibrant health. You now have all the knowledge you need to become a successful brine shrimp breeder.
Ready to provide the best for your aquatic world? Upgrade to the ultimate hatching system.
Comments are closed.